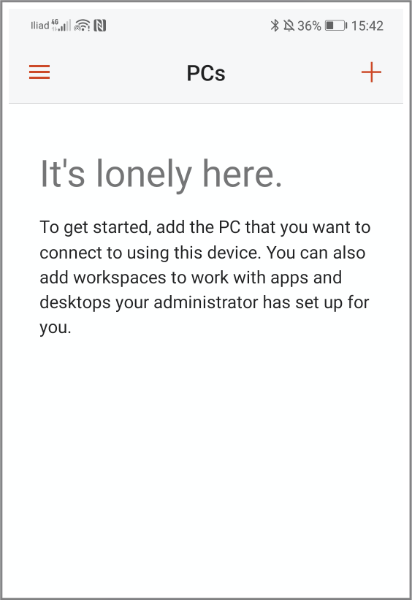
This guide shows how to properly set remote control of your EAGLE from an Android device, like a tablet or a smartphone. This article has been written by using a Android smartphone 9.1 and Microsoft Remote Desktop client 10.0.7.1066. From the Google Play Store of your device, please search and install the “Microsoft Remote Desktop” app. If you do not know how to install the app from the Google Play Store, please read the manual of your computer. Thanks to the remote control app, you have EAGLE with all your software on your device screen. Start the “Microsoft Remote Desktop” app. Click the + button (top-right), then select “Add PC”.
In the window that opens, in “PC name” enter 192.168.137.1. Then select the “User name” field and choose “Add user account”. A window will open where you can enter your username and password to log on to Windows.
The values are:
– Username: PrimaLuceLab;
Password: (that shown in the flyer in the EAGLE box)
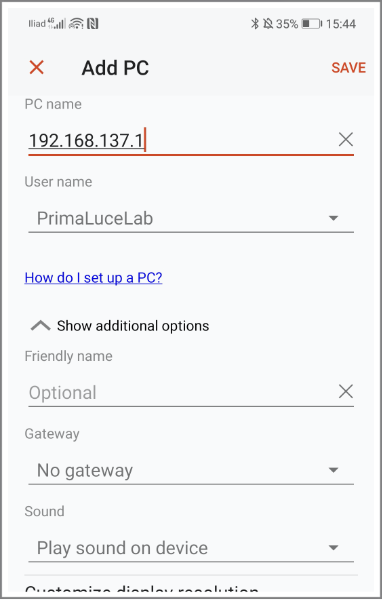
Then press the button “Save” to save the access data. WARNING: when entering your data check that your device does not automatically insert a space after the word “username” and “password”. Then select the option “Connect to an admin session” and press the “Add” button to confirm and save the access data. Returning to the main page you will find a new connection. Make a double click on the connection and and you’ll see on your device’s desktop EAGLE. Now you are ready to use the software you prefer to control your telescope. NOTE: You can also use another Remote Desktop client, the Parallels Client (you can download from Play Store). This client has to be set as the Microsoft one, the only difference is that this will ask also the Port number, please set it to 3389.
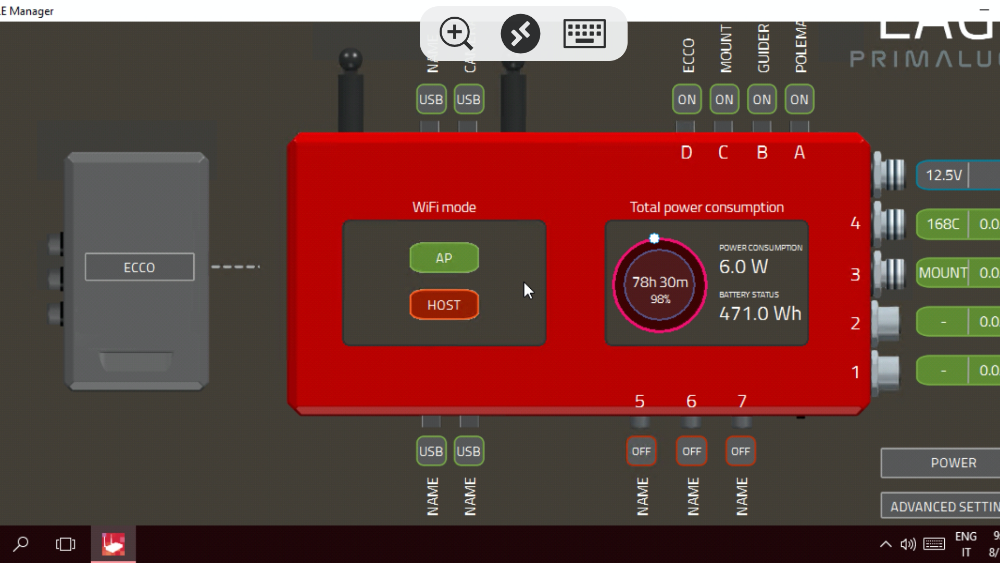
NOTE: After being connected to the EAGLE’s WiFi, I start Remote Desktop connection but the error “Unable to connect” appears. How can I fix this?
This error may happen if your Android device doesn’t have an internet connection, for example when (or if) it doesn’t have a 4G connection. In this case, please proceed this way: in the Android device please select the Wifi settings of the EAGLEXXXXXX network you connected to. Here we have to write a manual IP address for the network of your EAGLE. The IP address of your EAGLE’s AP interface is 192.168.137.1. An address must be selected in the same network range, and it must be unique. This is done by changing the last “octet” of the network address. Your EAGLE ends in “.1” You can select any other address starting with “.2, up to “.254”. Remember if you have multiple devices accessing your EAGLE, you should choose and assign a unique IP to each device. In this example, we have chosen “.103” – so the IP address we have configured is “192.168.137.103. Configure the netmask and router as shown in the example above. The router is the IP address of your EAGLE. Press the blue EAGLEXXXXXX text on top left to confirm.
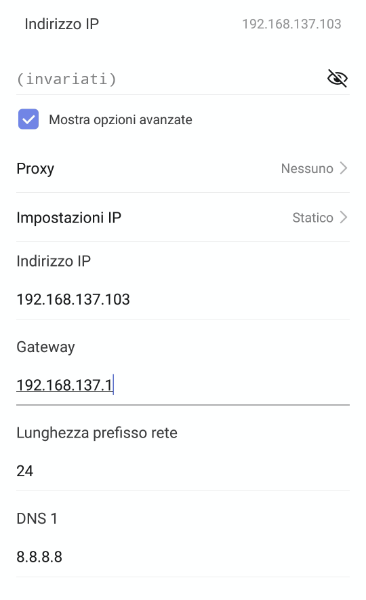
Next configure DNS to the IP address of your EAGLE (192.168.137.1).
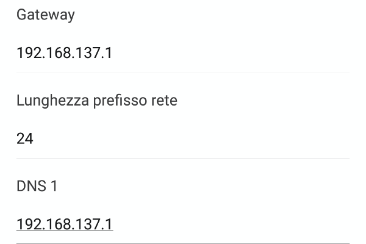
With the IPv4 address and DNS settings configured manually, the Remote Desktop should work correctly. Please launch again the Microsoft Remote Desktop app and start the connection. If the “Certificate can’t be verified” window appears, please select “Never ask again for connections to this PC” and click CONNECT button to start.
