In this article we describe how to connect an ASCOM compatible astronomy camera manufactured by QHYCCD to PLAY astrophotography software. In fact, starting from 1.1 version, PLAY astrophotography software allows you to remotely control astronomy cameras from different manufacturers like QHYCCD that provide ASCOM drivers. This way you can use PLAY not only to control PrimaLuceLab devices but also to have a preview of image from your camera and to capture a sequence of images. Please note: in order to be used with PLAY, you have to use ASCOM Platform at least 6.6 version (camera’s ASCOM driver has to be tested with ASCOM 6.6) and you have to have at least ESATTO focuser, SESTO SENSO 2 focusing motor or GIOTTO flat field generator.
In order to connect the ASCOM compatible camera to PLAY astrophotography software and remotely control it, please follow these steps:
With your devices and camera powered and connected to your EAGLE or standard Windows computer, launch PLAY and you will see the Configurator section.
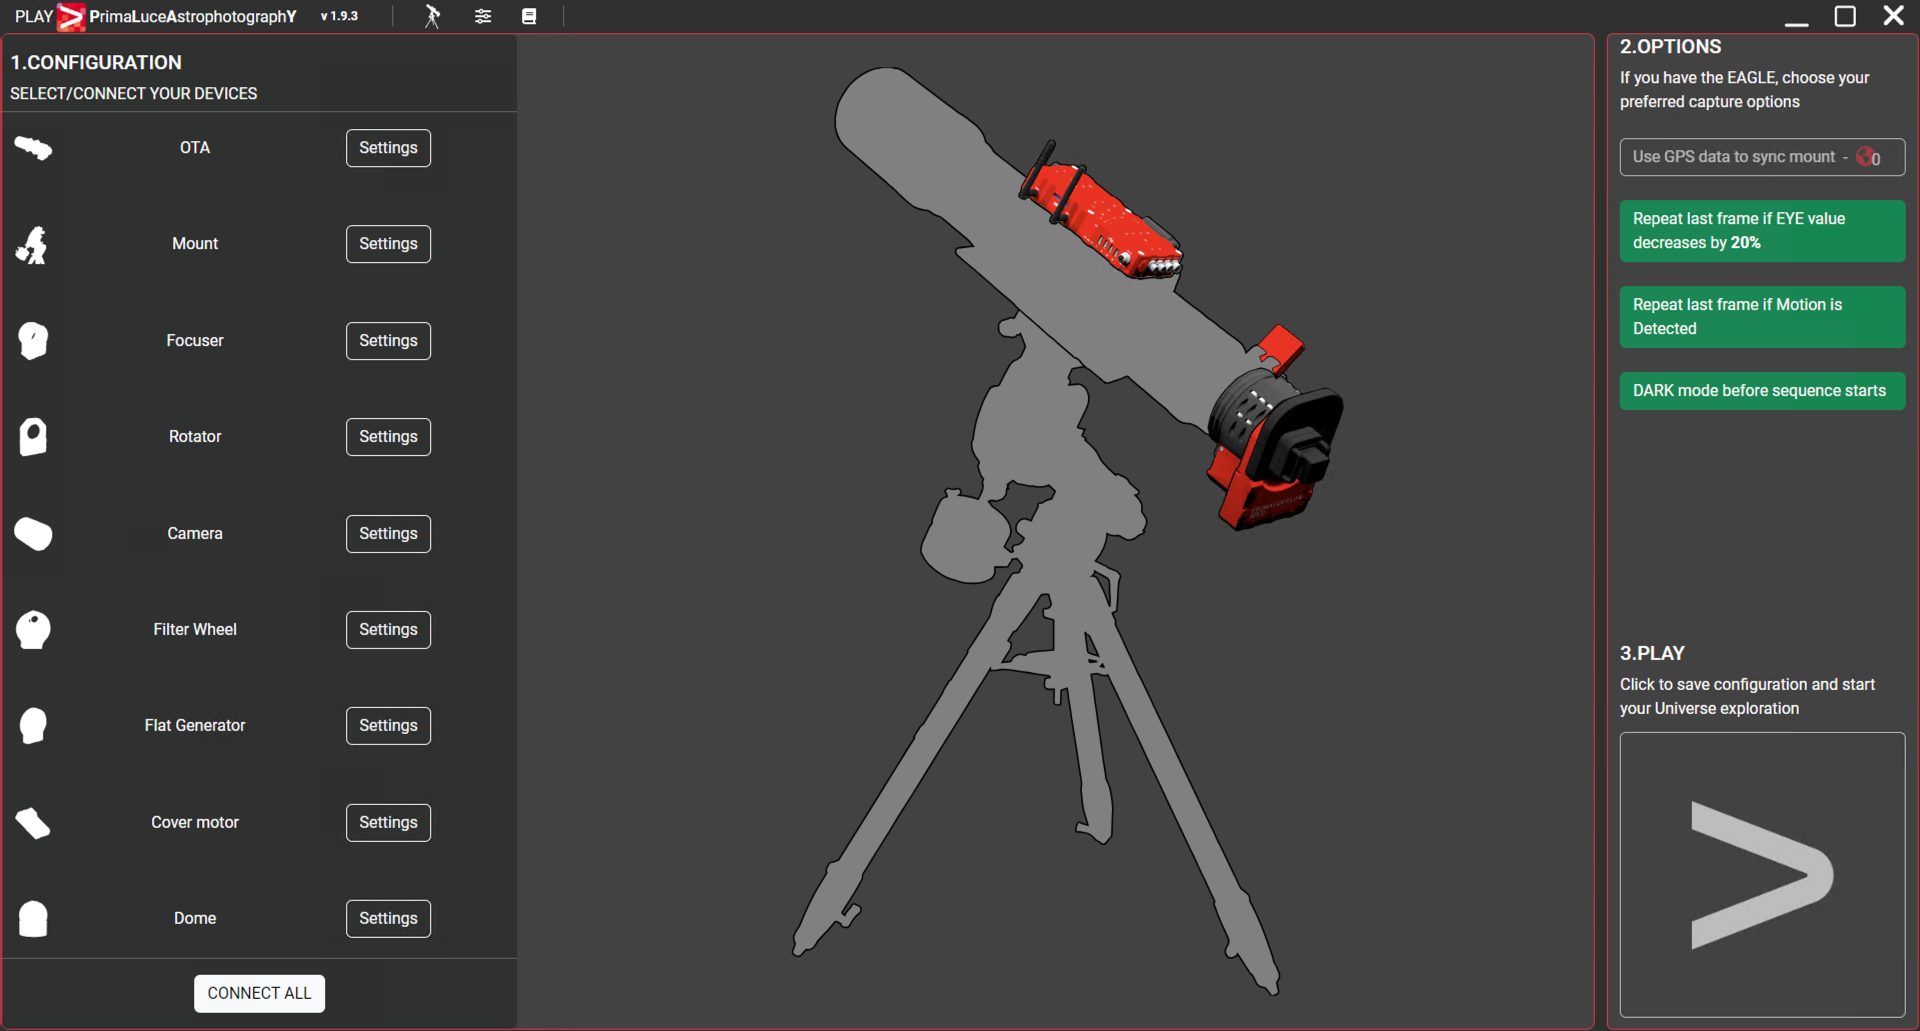
Click on Camera on the left column, this will open a popup window with the camera selector.
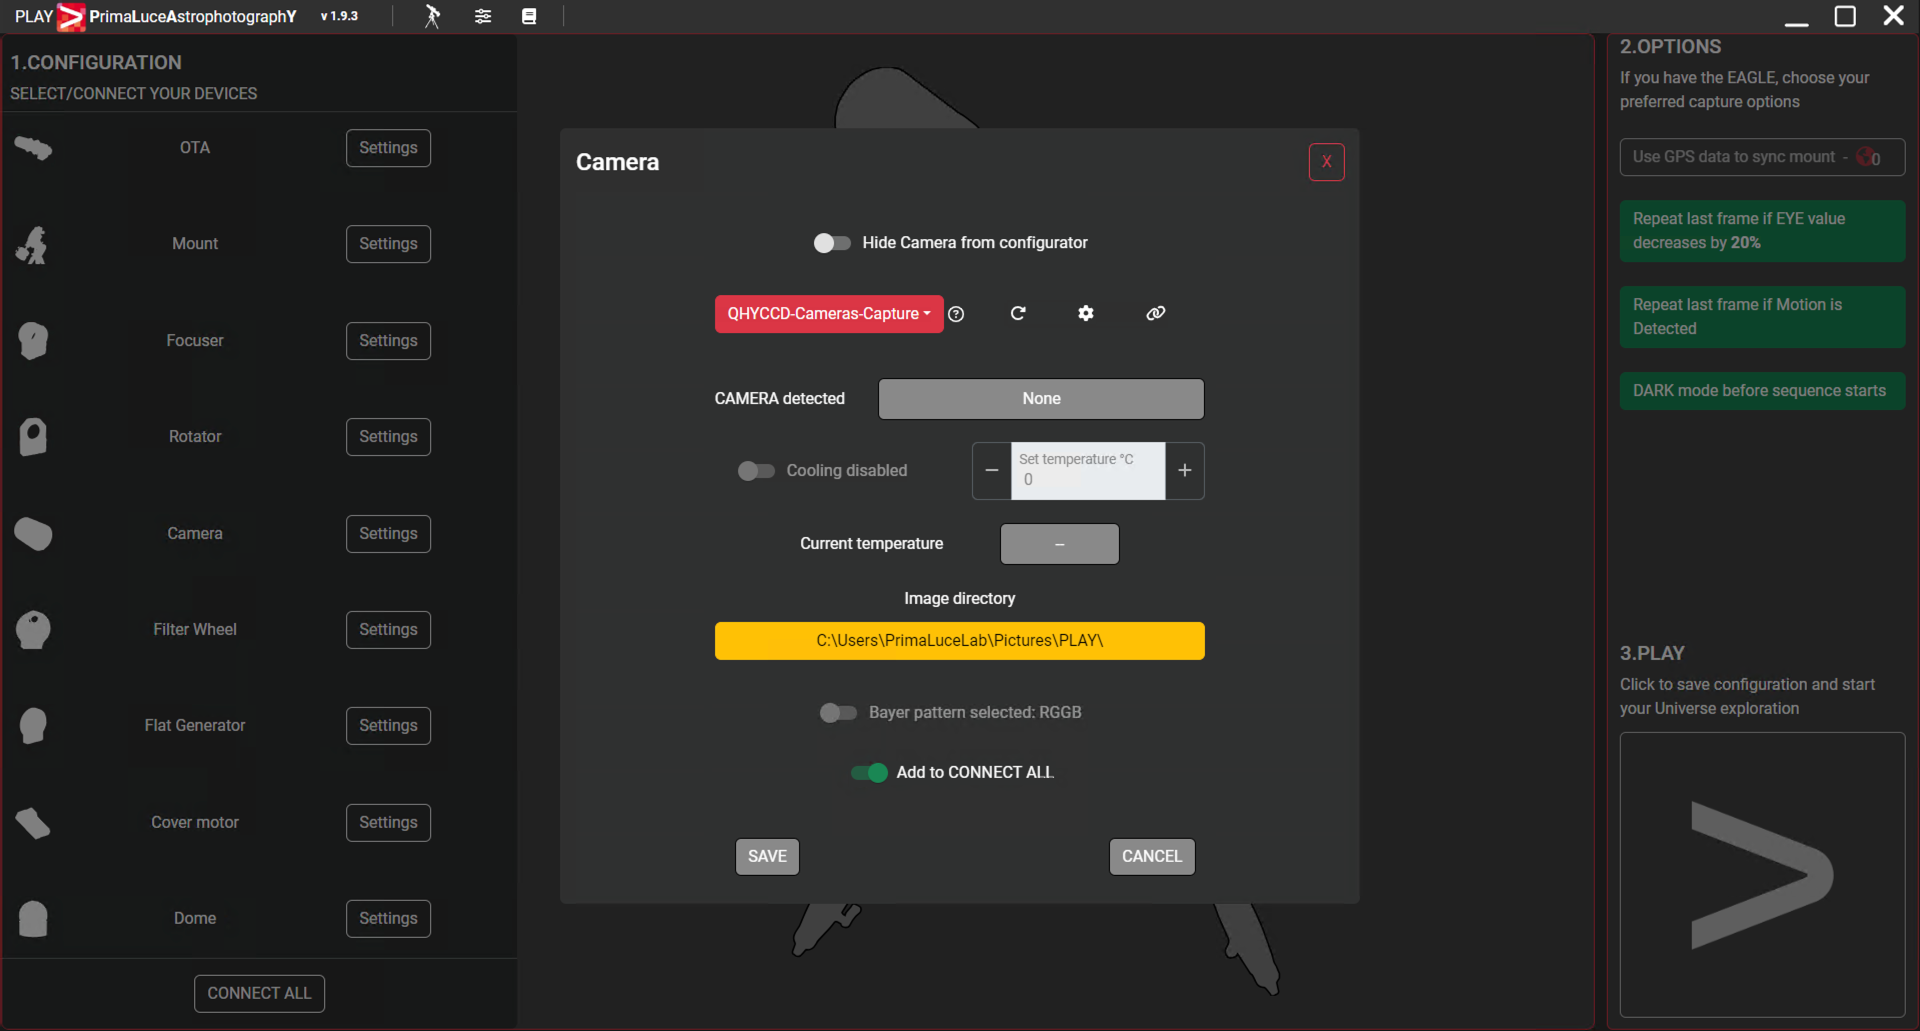
Select the ASCOM driver of your camera (in this example, since we’re using a QHY294C camera, we select “QHYCCD-Cameras-Capture”), then click the gear icon to open ASCOM settings.
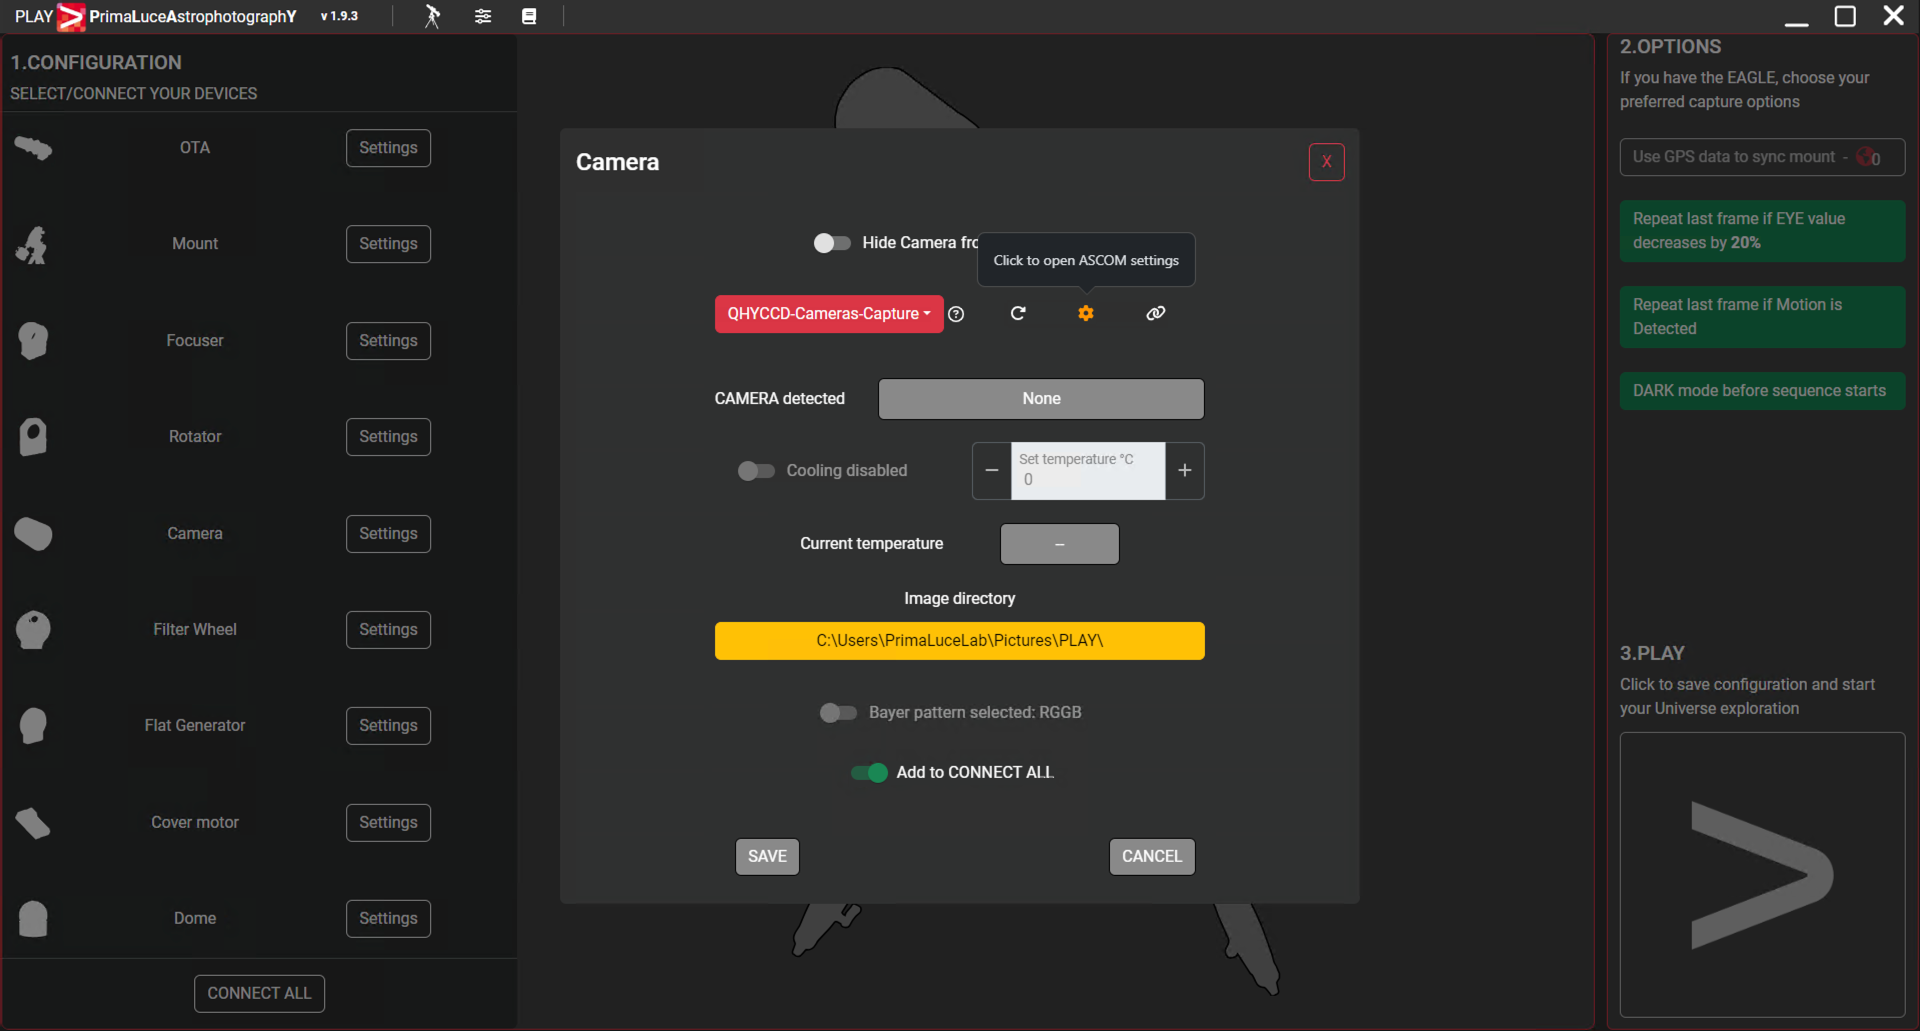
In the bottom part of the screen, close to PLAY software icon, you will see a new icon appearing, please click on it to show the ASCOM settings window. Here you have to select your camera model and specify Gain and Offset values based on manufacturer’s suggestions (please refer to the camera manufacturer user manual in order to identify the best settings). Then click on the OK button to confirm your settings.
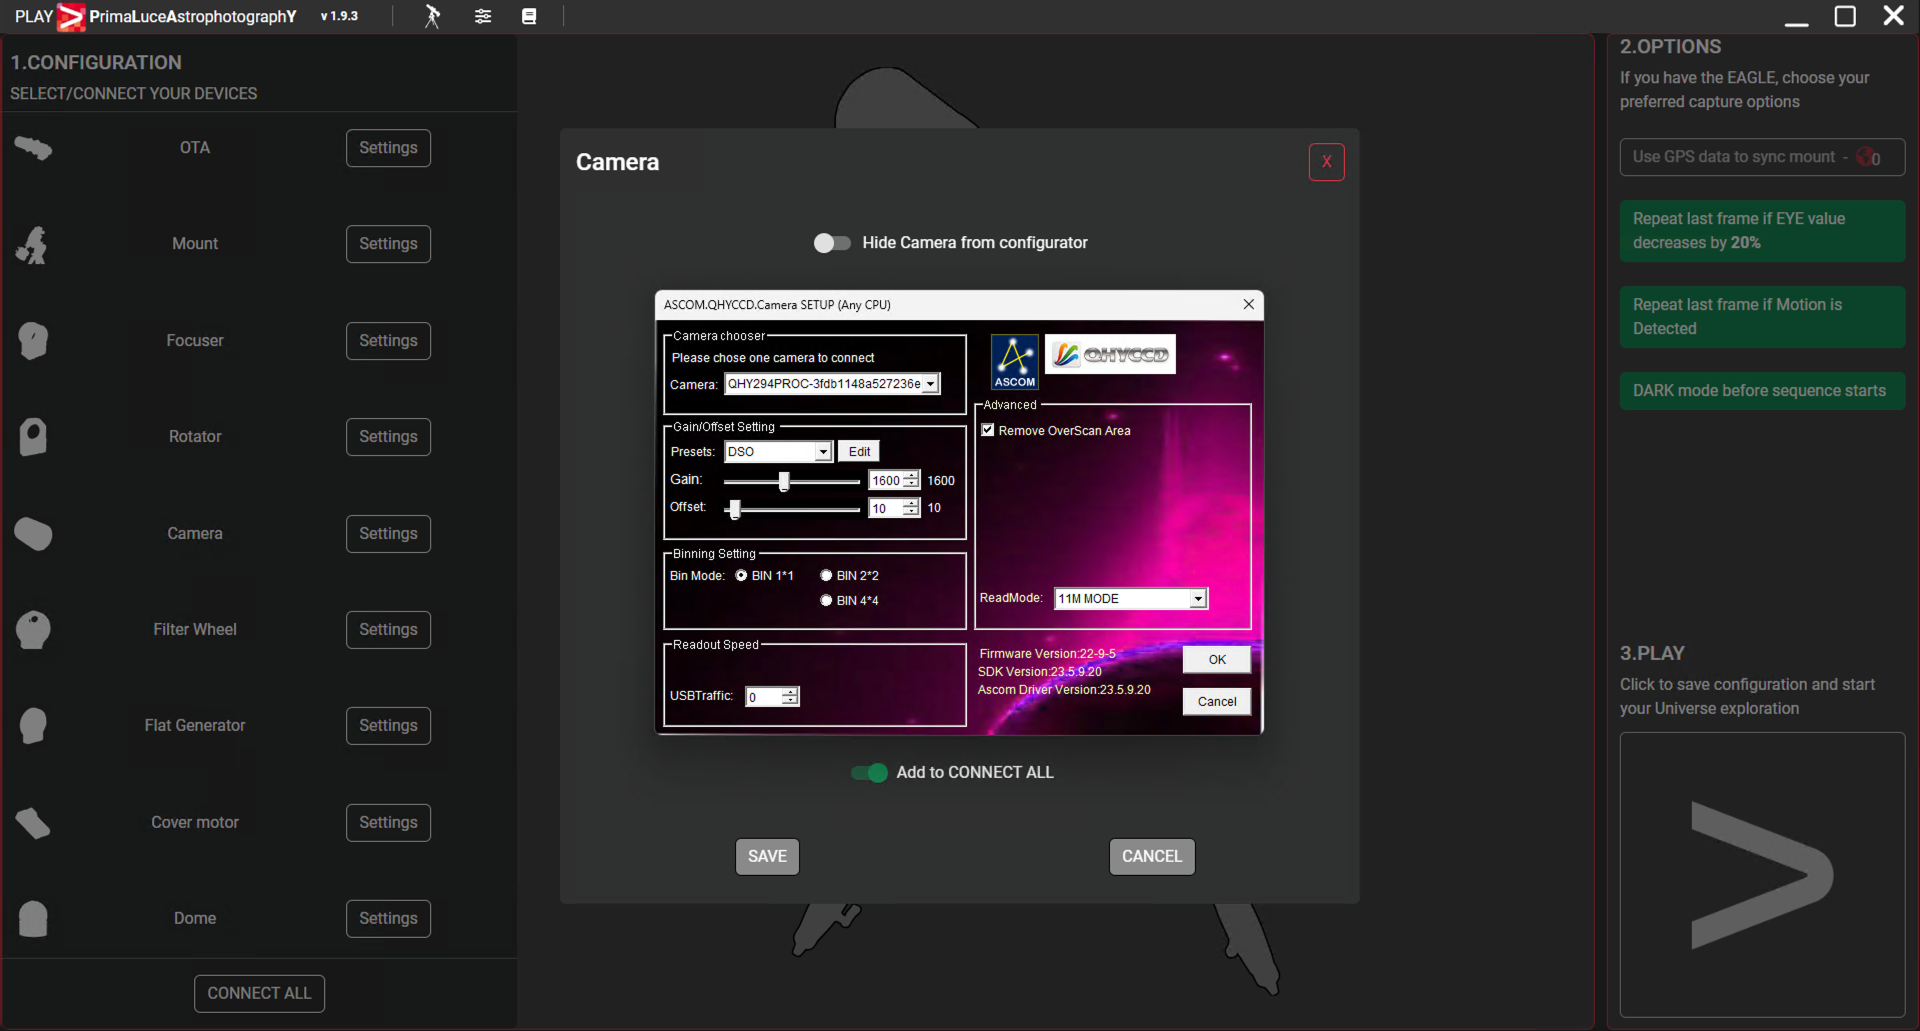
Click on the Connect icon to start connection to your camera.
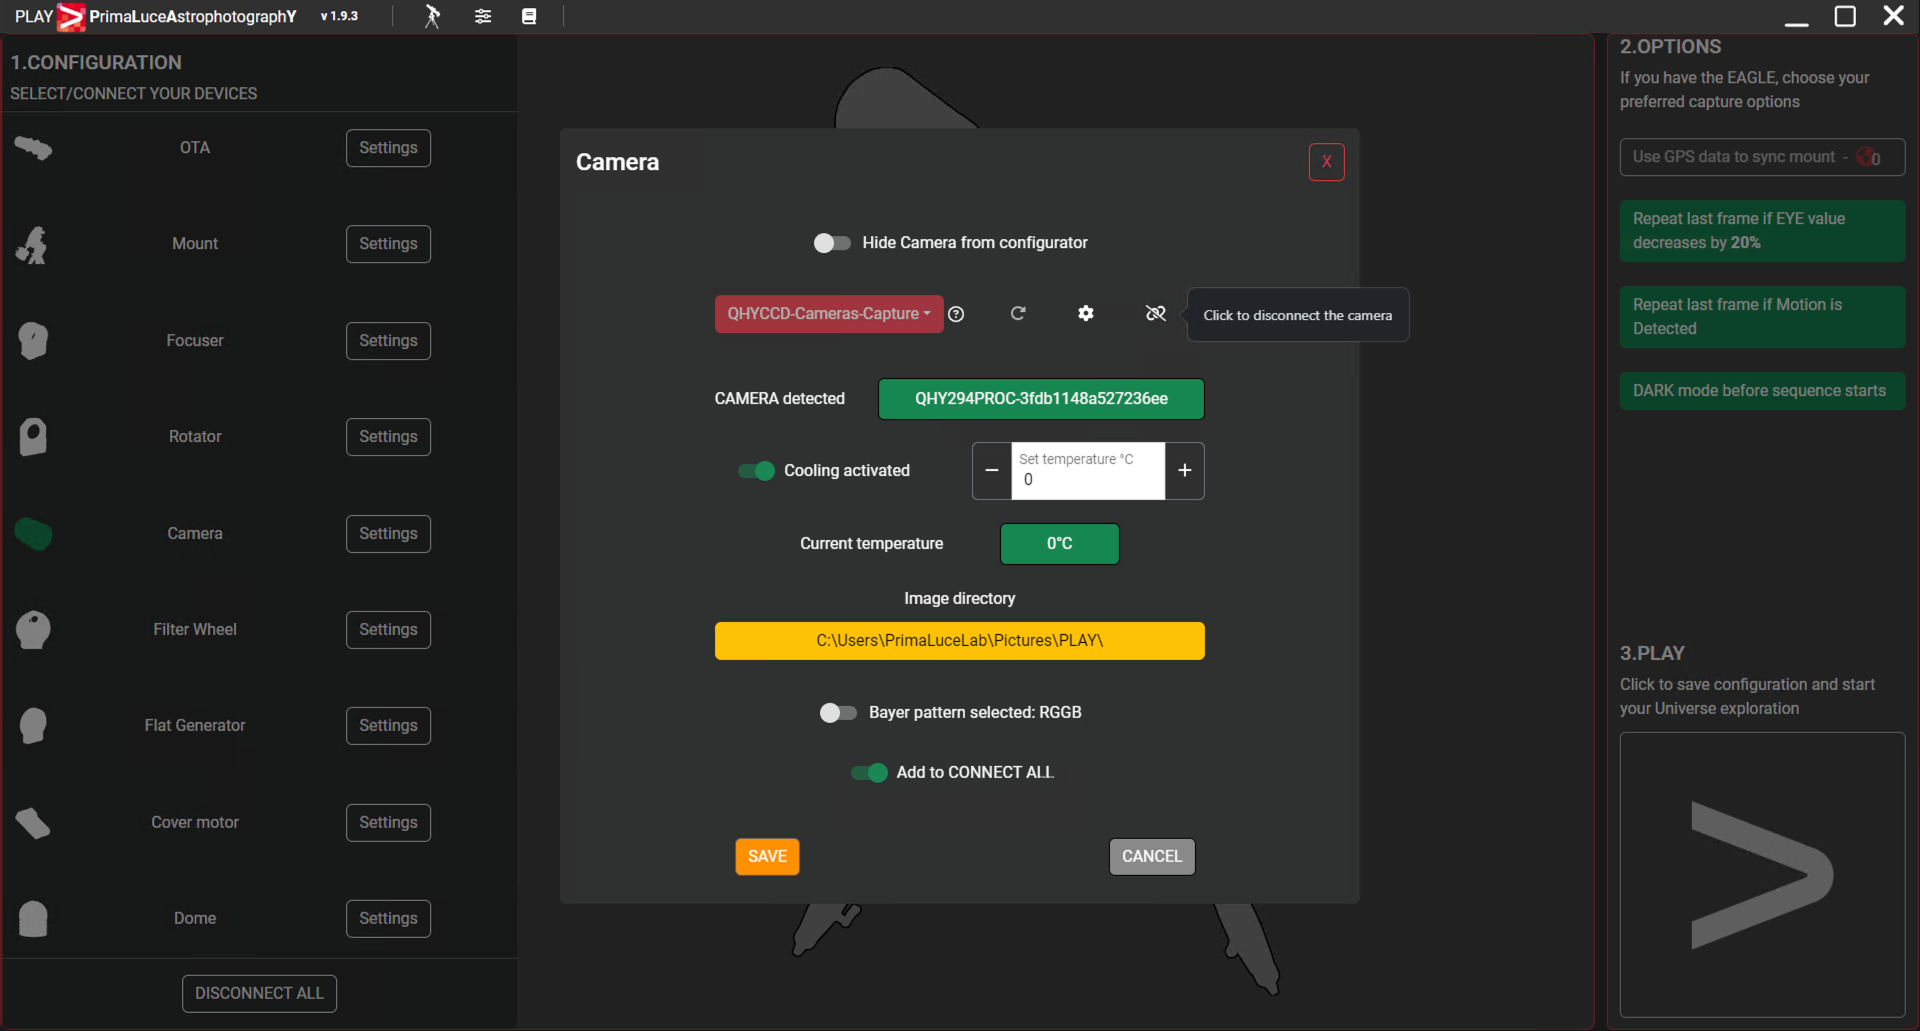
You will see the field to the right of “Camera detected” becoming green with the code of the camera you connected. Here you can select the “Activate Cooling” option to activate camera cooling system (you can set cooling temperature in the field below) and you can select the “Add to CONNECT ALL” option if you want PLAY to automatically connect with these camera settings the next time you will launch PLAY. Here you can also see the default directory where PLAY saves images. If you want to change the directory, you can click on the yellow field to select a new directory. Finally, press SAVE button to confirm, this will close the Camera selector window.
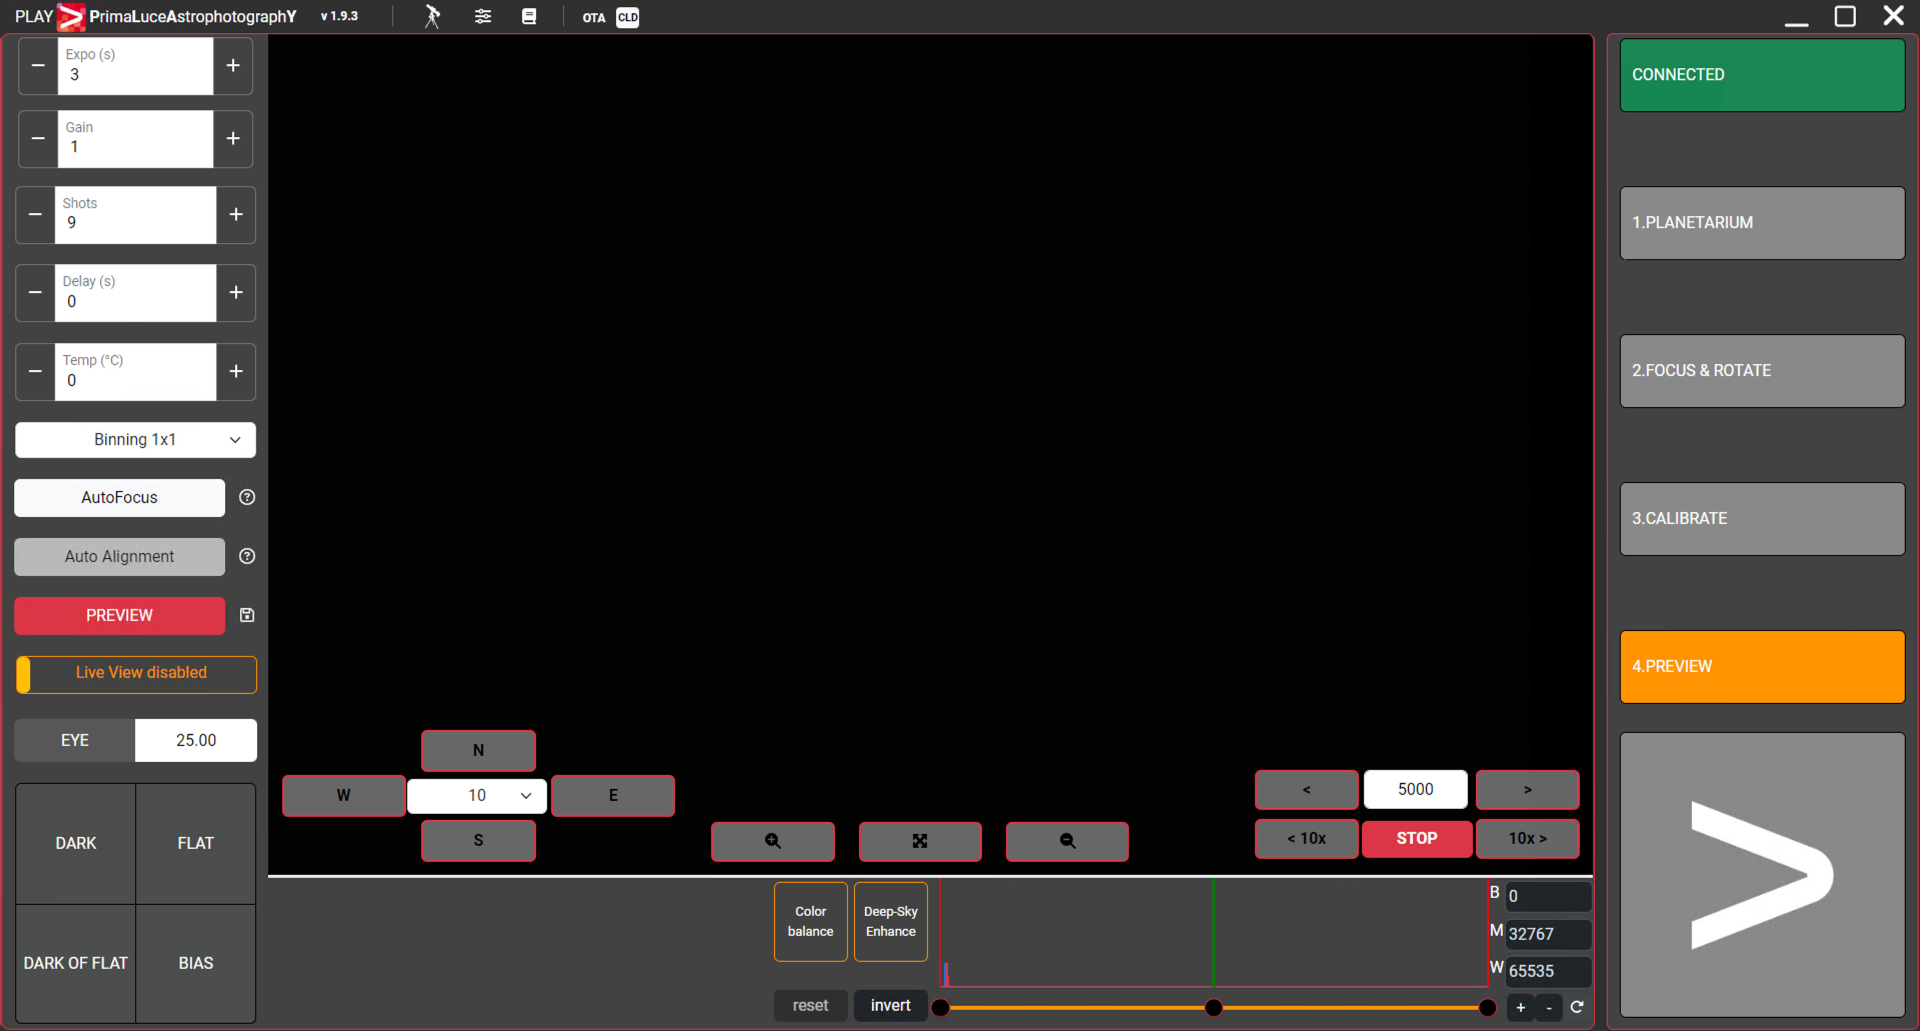
Click the large PLAY button in the bottom-right part of the Configurator window in order to move to Capture section of PLAY.
Here you will see the PREVIEW tab where you will find all the controls to set your acquisition settings and to capture images. First of all you can set your camera acquisition settings on the left column: we suggest you to set an exposition time, based on the telescope you have and on the object you want to record, then select the Binning value you want to use and, if you have a color camera, the Debayer mode it uses (please refer to your camera manufacturer user manual in order to discover what Debayer mode it uses). Then you can click on the Preview button to have a single preview of the image. If you want to loop image, you can select the “Live view” option below the Preview button.
