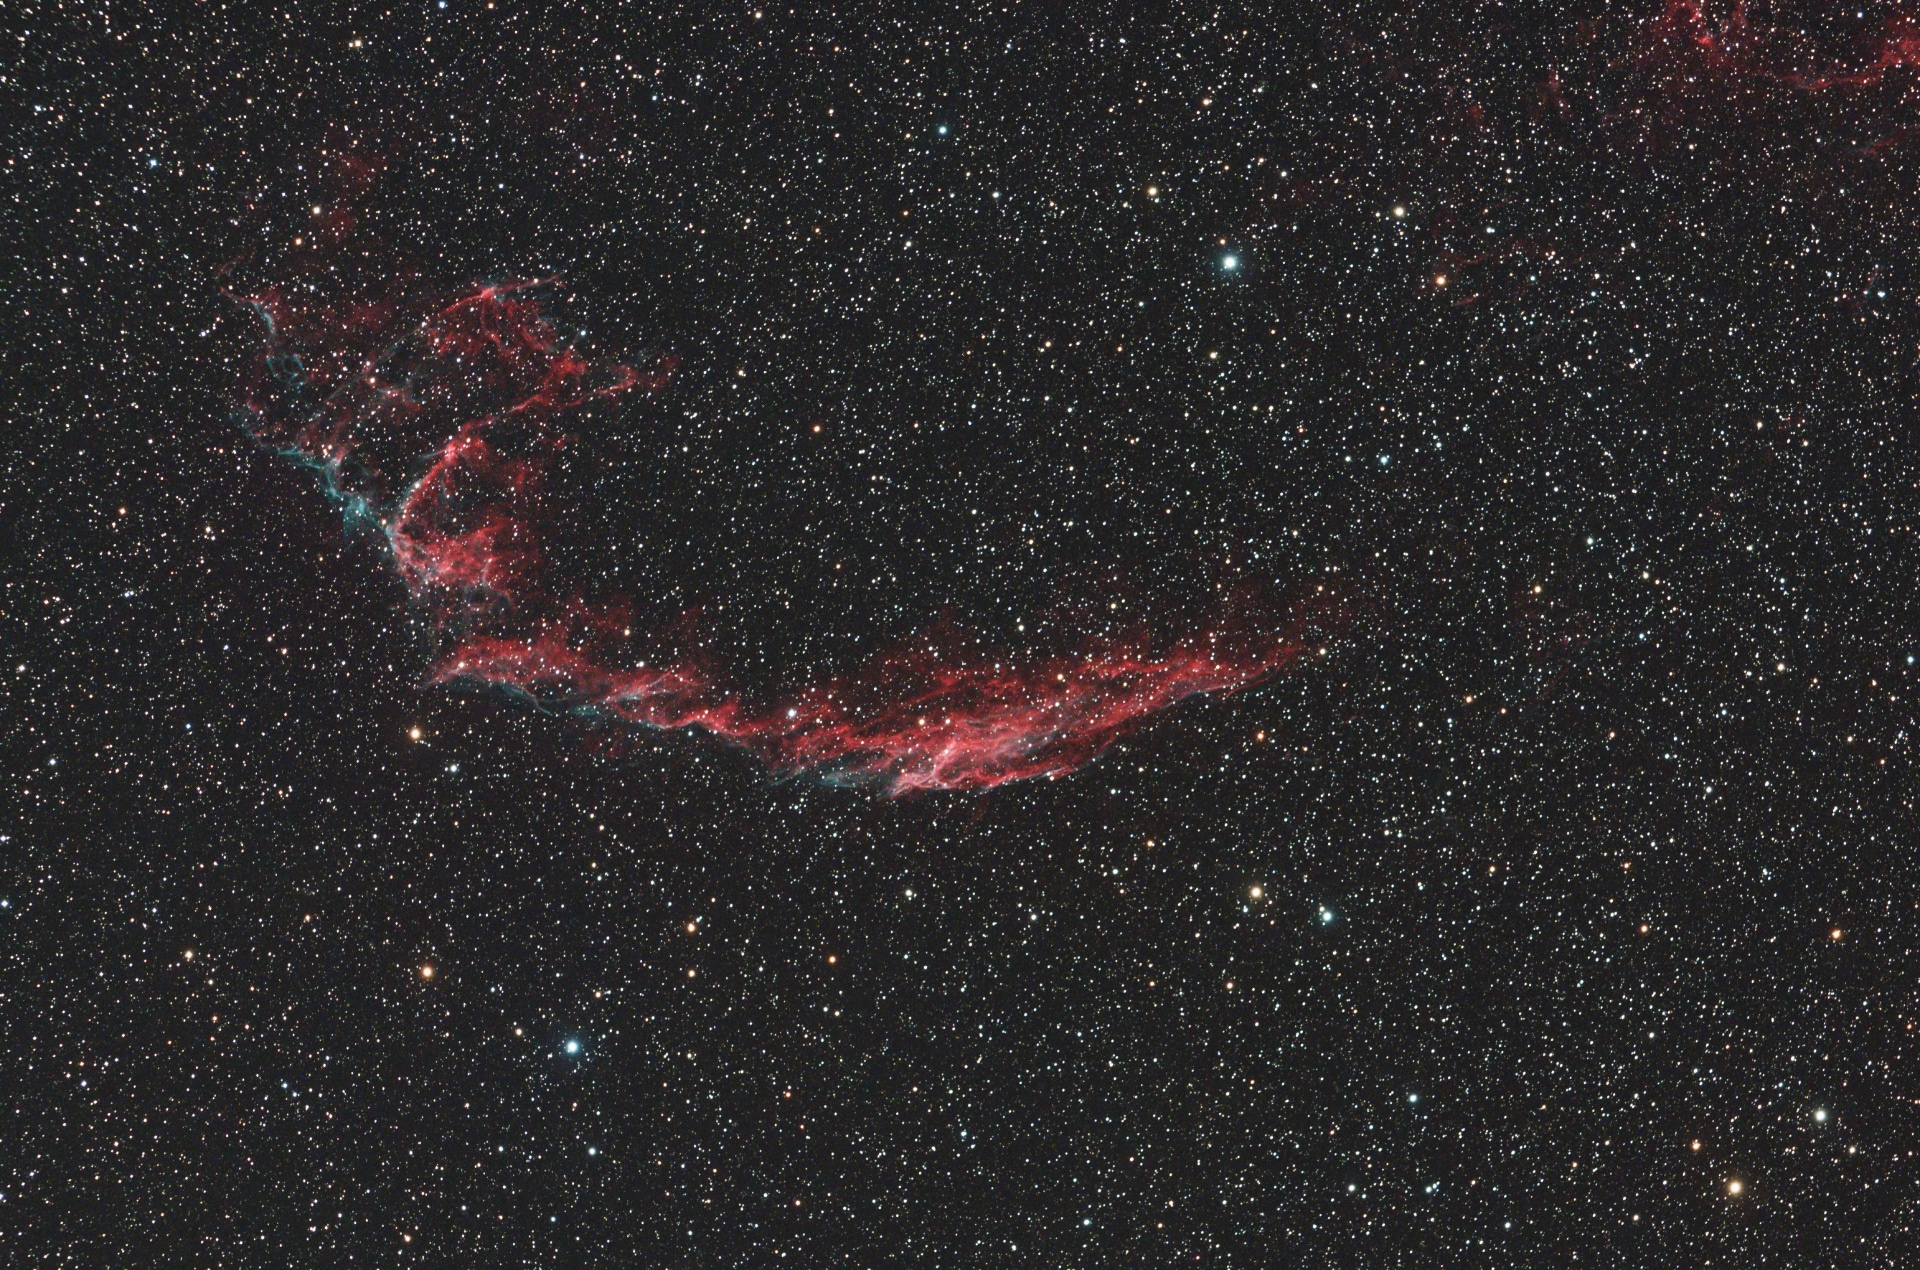
In this article we show how to use PixInsight to process deep-sky objects images recorded with PLAY astrophotography software. In this tutorial we’re going to process an image of NGC6992 nebula captured with a 100mm apochromatic refractor telescope on AZ-EQ6 mount in alt-az mode, with ESATTO focuser, ARCO rotator, GIOTTO flat field generator, ALTO telescope covering motor and QHY268C cooled camera. The telescope was remotely controlled and powered with the EAGLE and we captured all the images by using PLAY.
PLEASE NOTE: this is a basic workflow that you can follow to start deep-sky image processing. PixInsight provides a high level of personalisation so please refer to its user manual for more details. For a professional level astrophotography tutoring about image processing with PixInsight, we suggest you to visit Masters of PixInsight.
In order to use PixInsight to process images recorded with PLAY, you can follow the next steps.
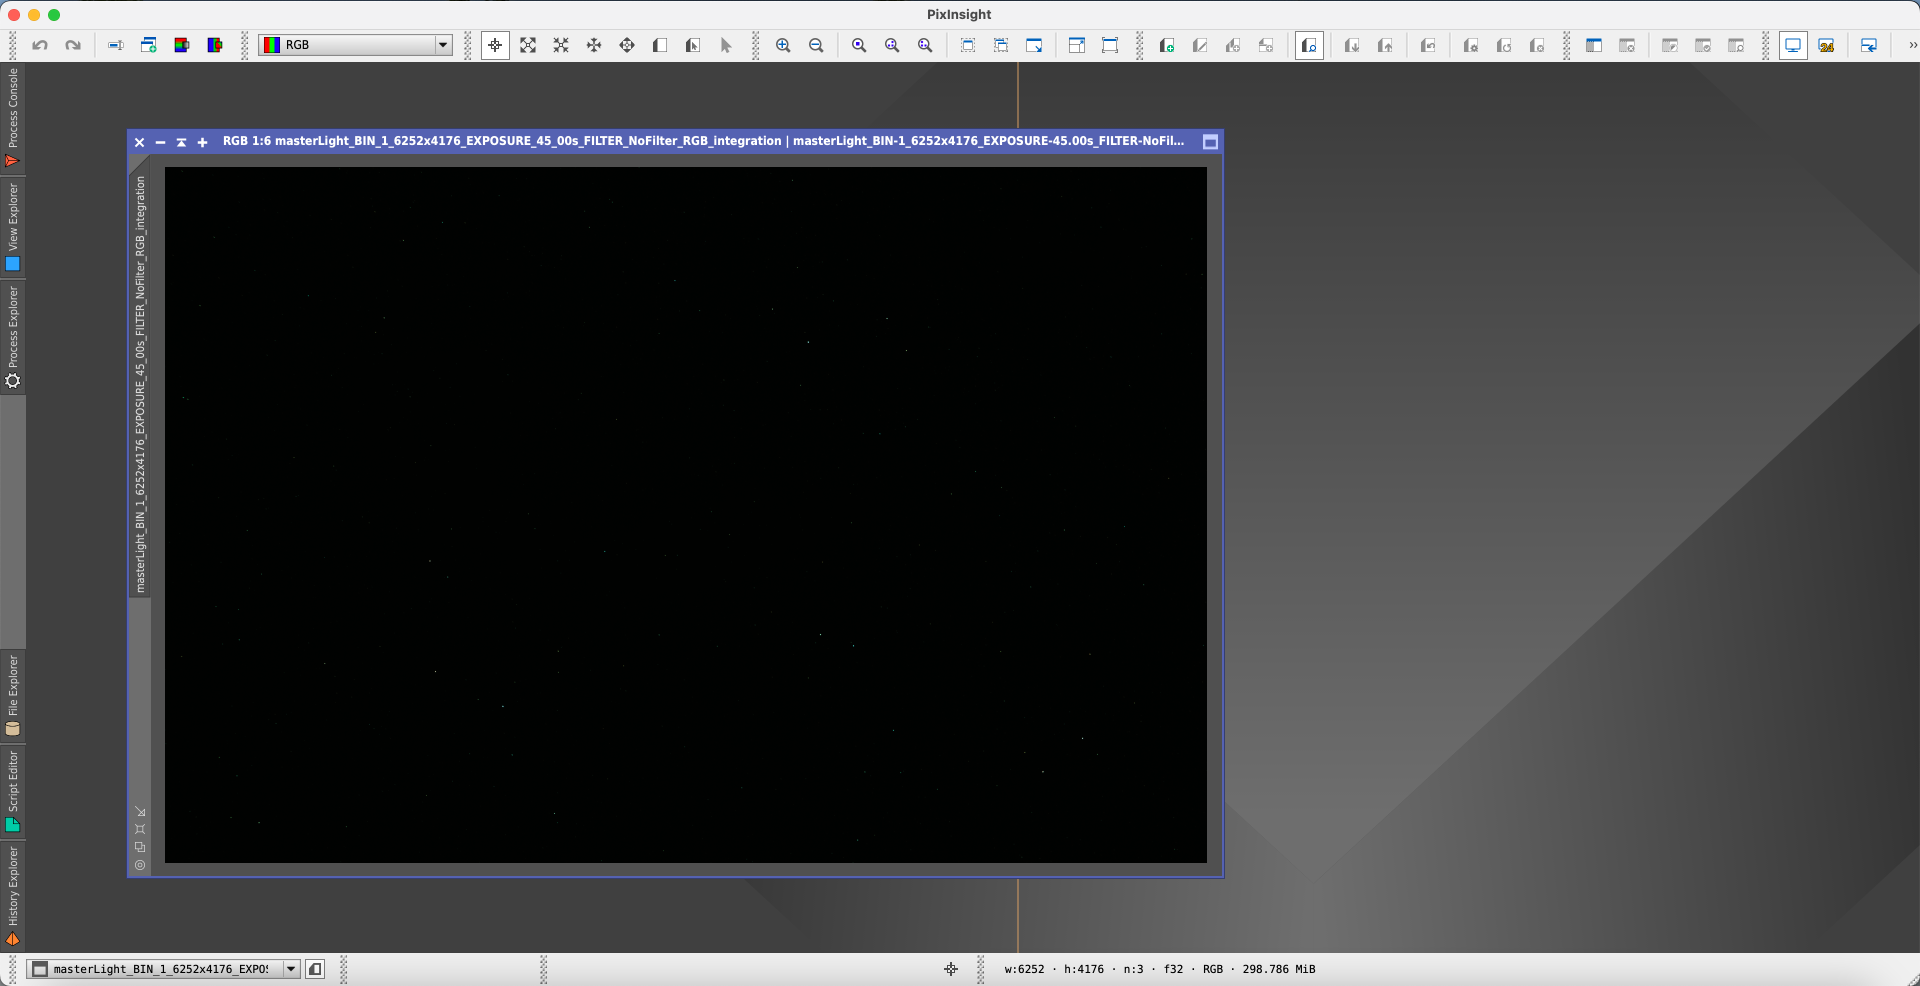
Open your calibrated image with Pixinsight, most probably it will appear very dark because of a combination of factors related to how astronomical images are captured, processed, and displayed. After calibration (removing DARK, FLAT, and BIAS frames), the raw data in the FITS file represents the actual signal collected by the sensor, but this signal is typically very faint, especially for deep-sky objects like nebulae. The image data in a FITS file is in a linear format, meaning that the pixel values are directly proportional to the light received by the sensor. Most astronomical objects are very faint, and the light they emit spans a broad range, with the majority of the details being buried in the faintest part of the picture. Another important factor is the limitation of standard computer screens, which typically display images at 8 bits per channel, allowing for only 256 levels of brightness per channel (red, green, and blue). However, FITS images are often stored in 16-bit per channel format, which allows for 65,536 levels of brightness per channel. This creates a mismatch between the dynamic range of your image and what your screen can display. As a result, most of the faint detail in the image gets compressed into a narrow portion of the brightness range, making the image appear very dark or lacking in detail before processing.
But no worries, the signal is there and that’s why processing of deep-sky astrophotography images is critical in order to better highlight dimmest parts of the captured galaxies, nebulas or star clusters.
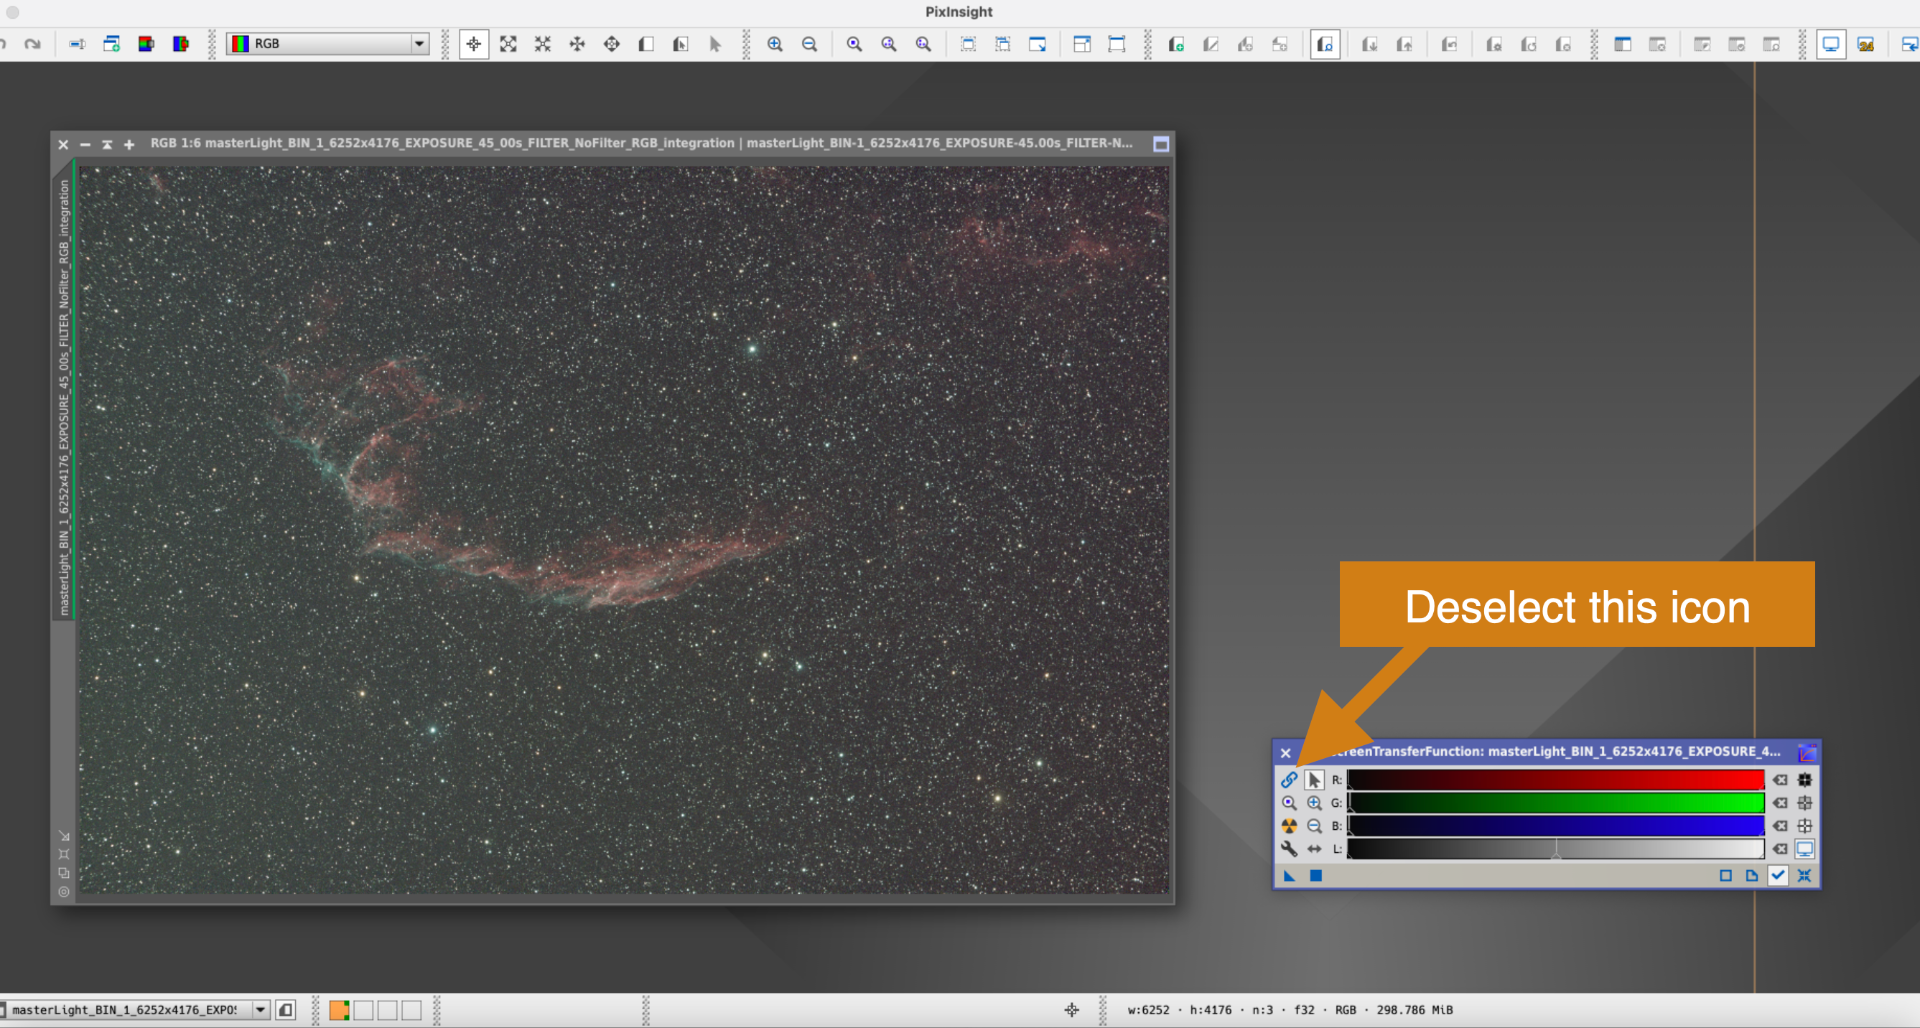
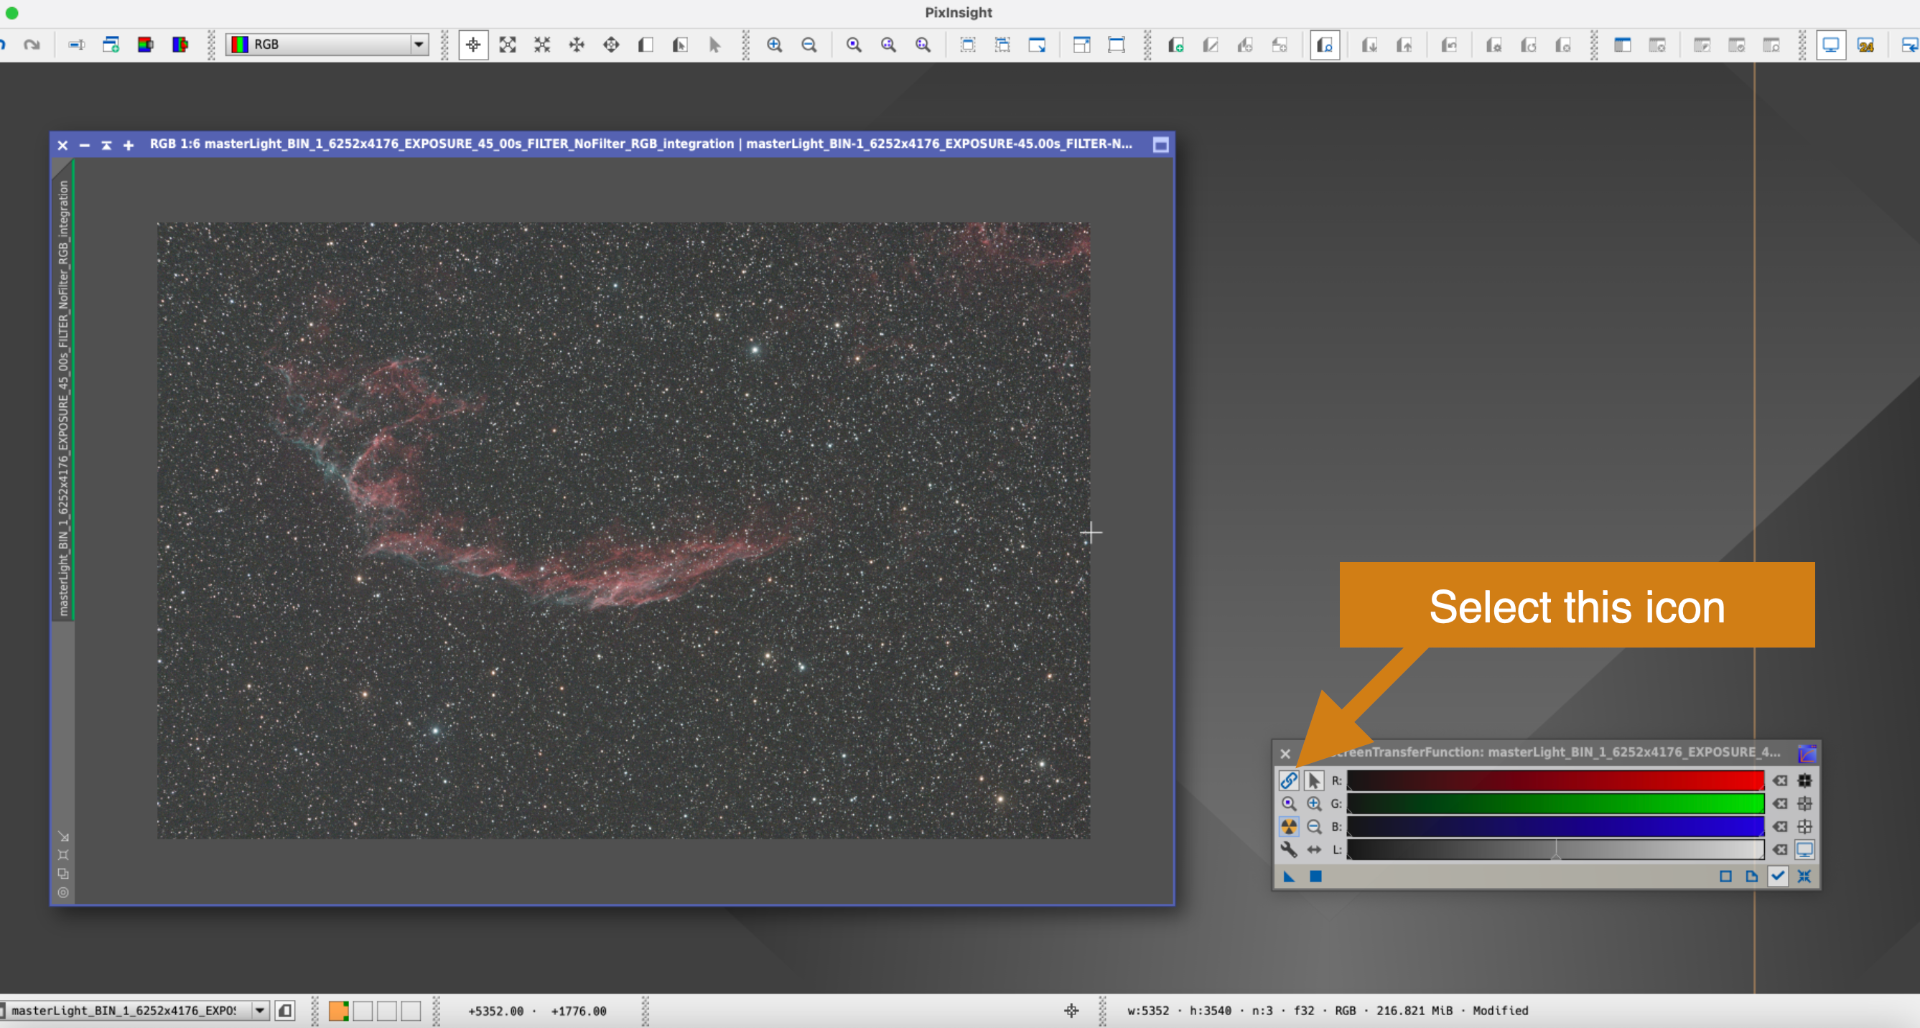
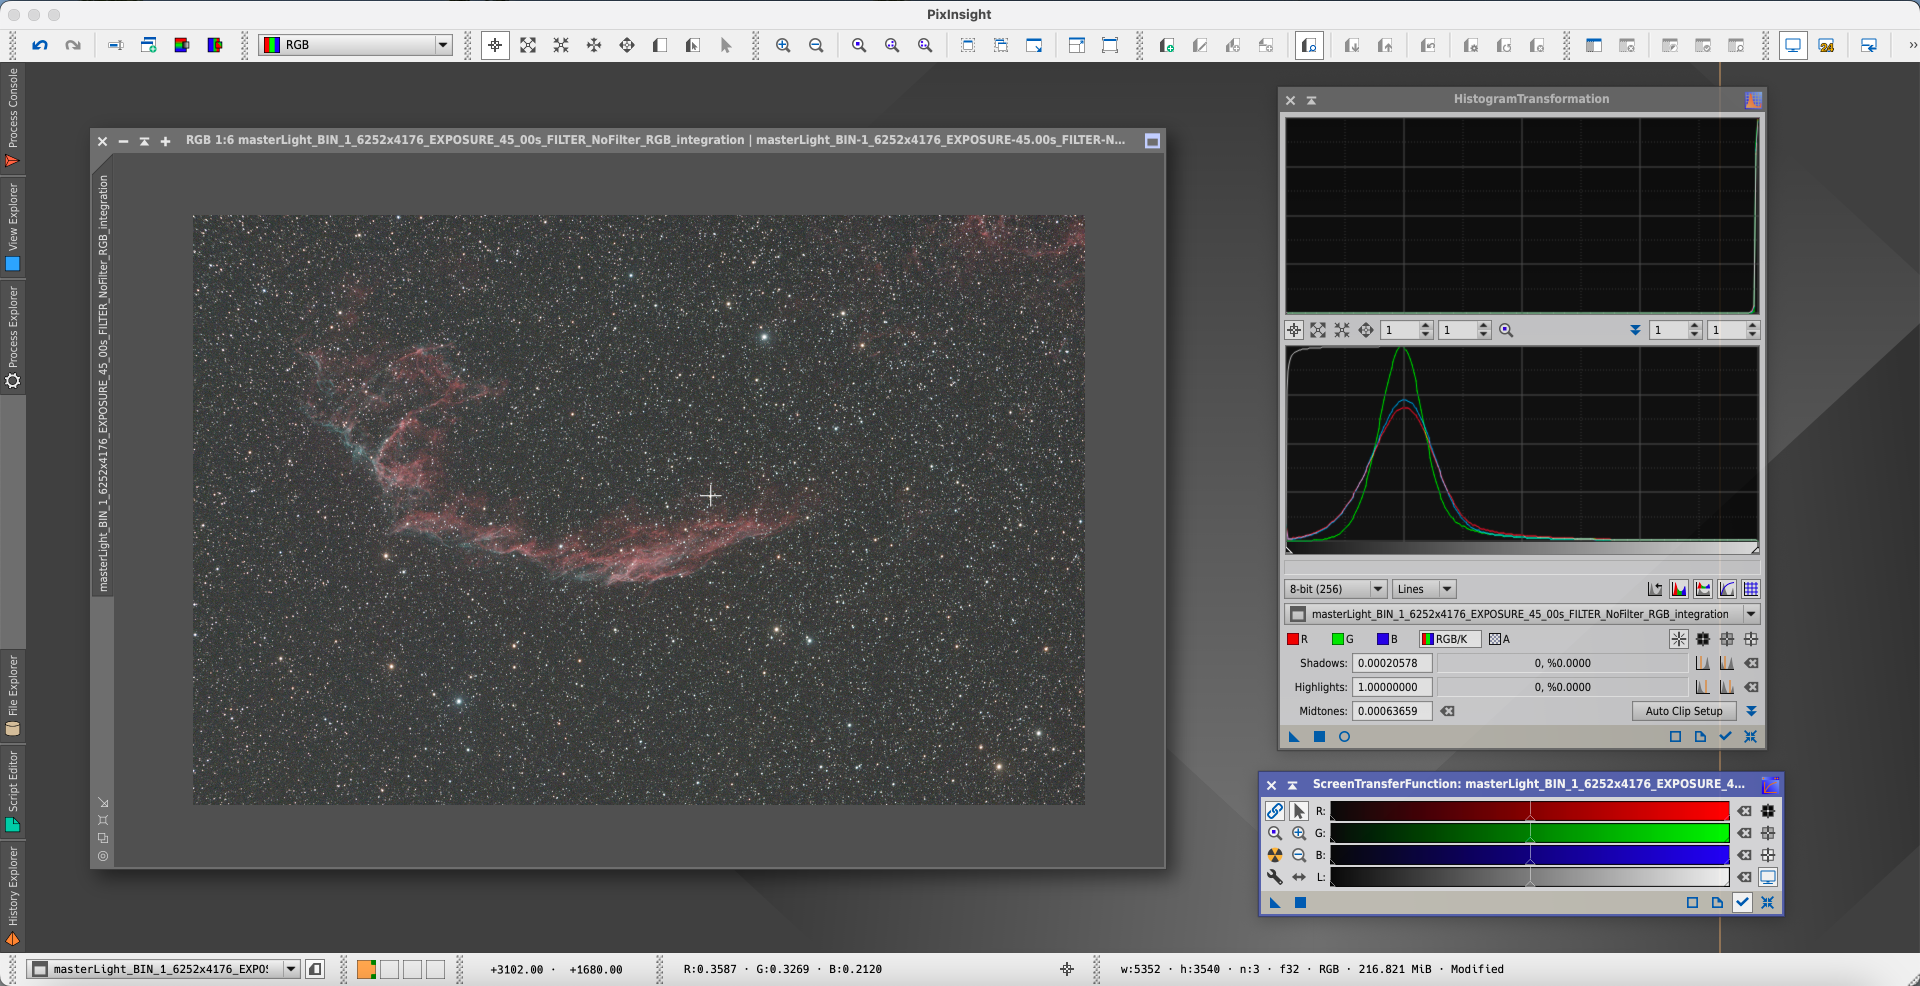
Select “Screen Transfer Function” tool (Process -> All Processes -> ScreenTransferFunction) and, with the “Link RGB Channels” option deactivated (very important), press the button with the “Nuclear” symbol above the “wrench” icon. This will improve visibility of the deep-sky object also with a better color balance.
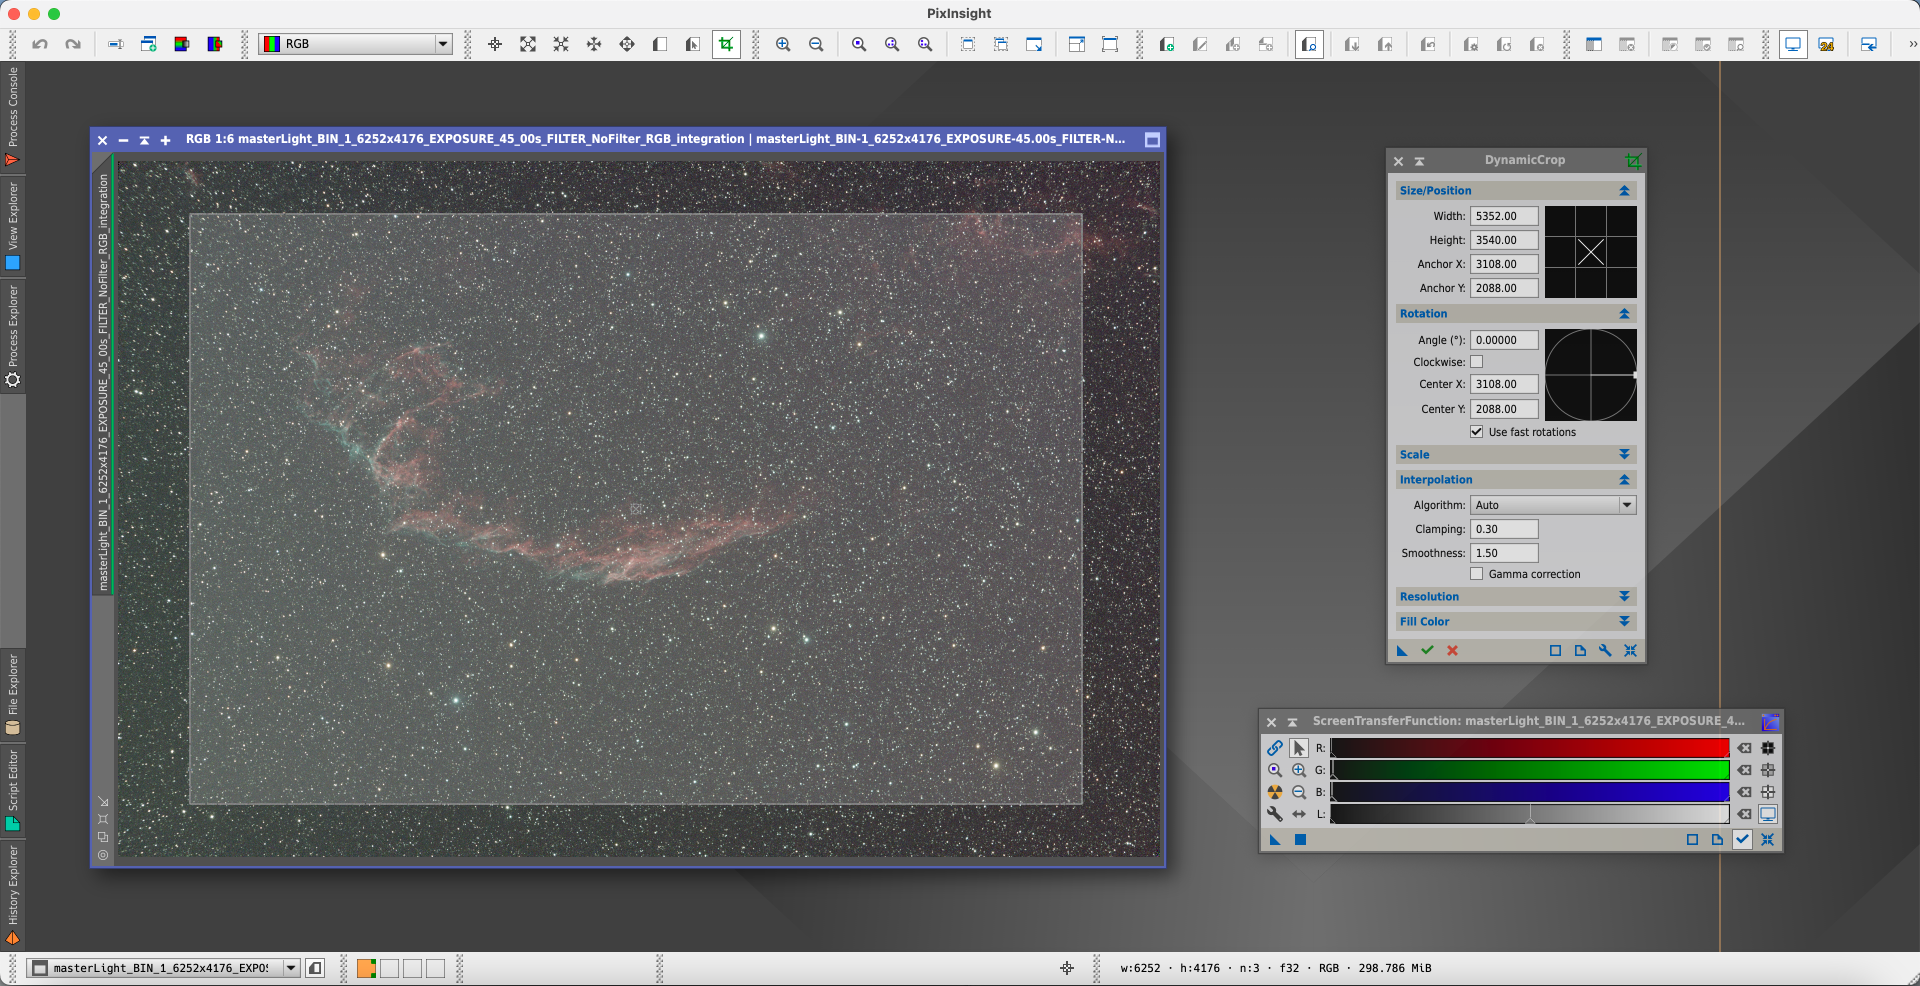
Now it’s important to use the “Dynamic Crop” tool (Process -> All Processes -> Dynamic Crop) to crop the image, removing the image edges with defects or peripheral areas with little signal due to the shift in the frame of various exposures caused by dithering or possible alignment issues. You can drag a box within the image, which must then be confirmed by clicking the green checkmark at the bottom of the tool window.
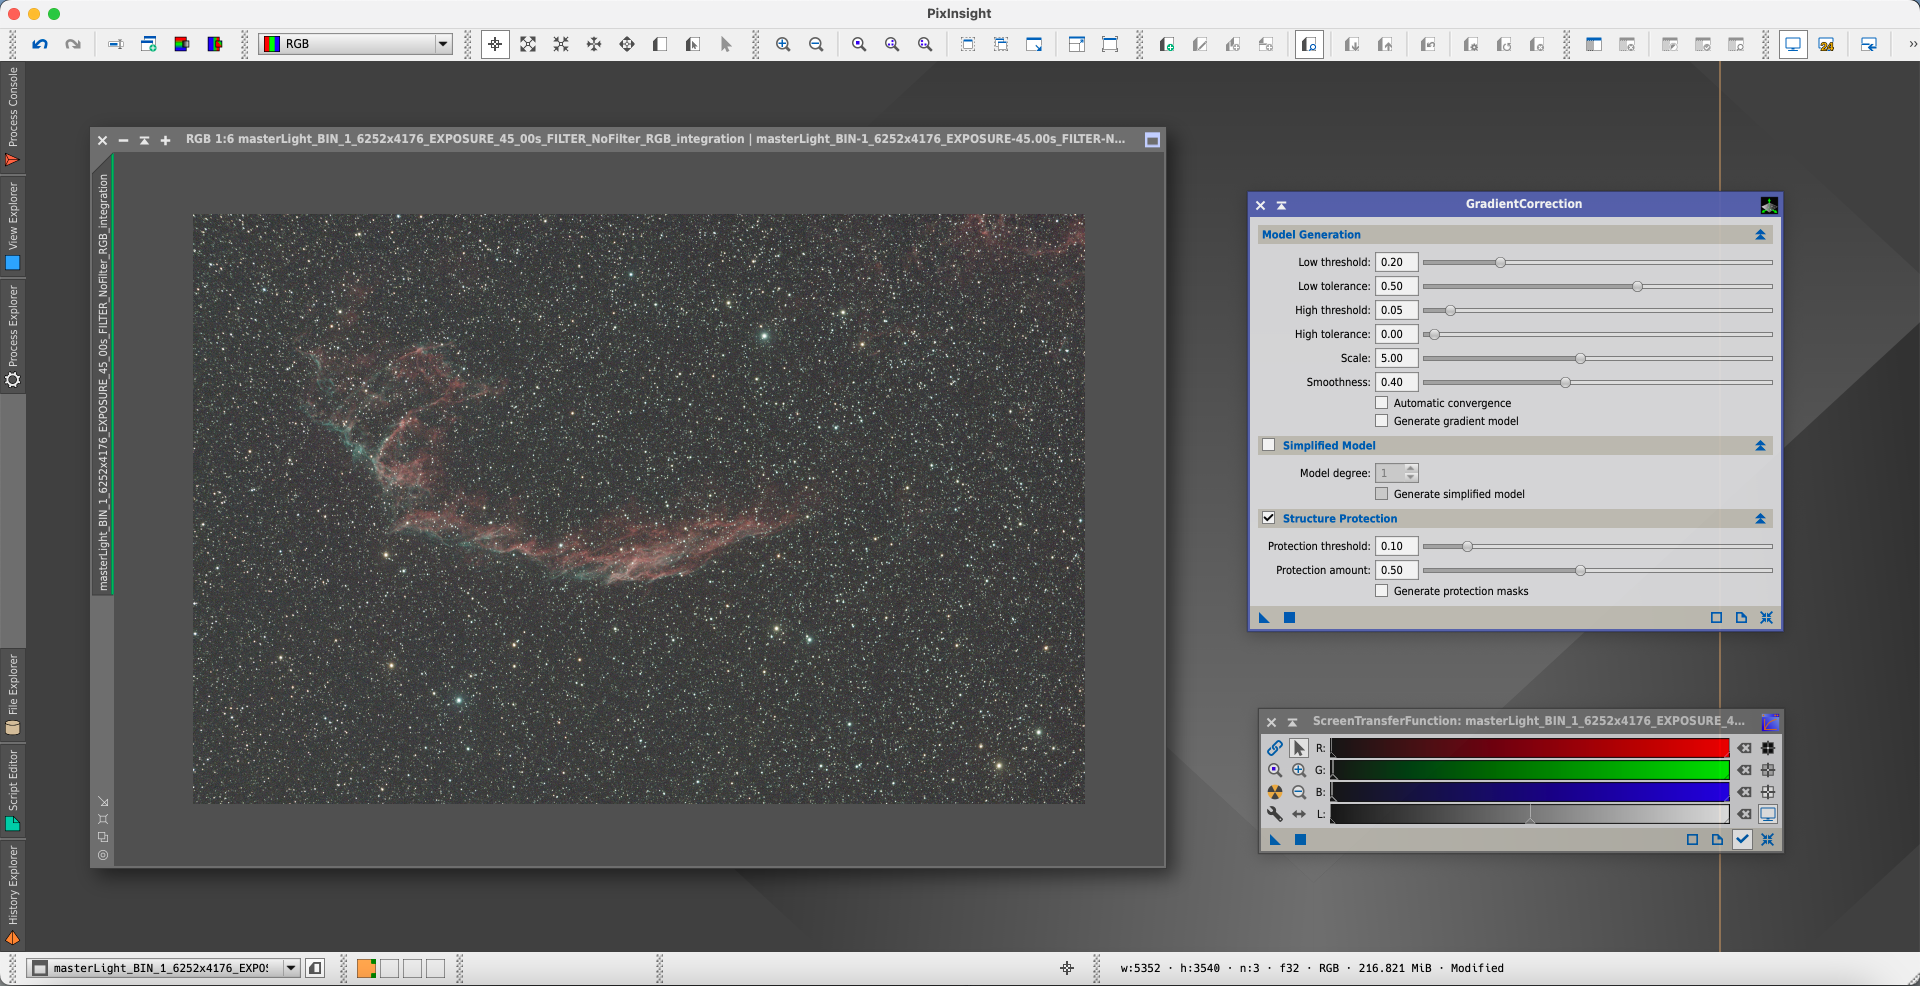
The next step is removing gradients with the “Gradient Correction” tool (Process -> All Processes -> GradientCorrection), which in most cases works perfectly with PixInsight’s default settings. Simply click on the blue square at the bottom left of the GradientCorrection window.
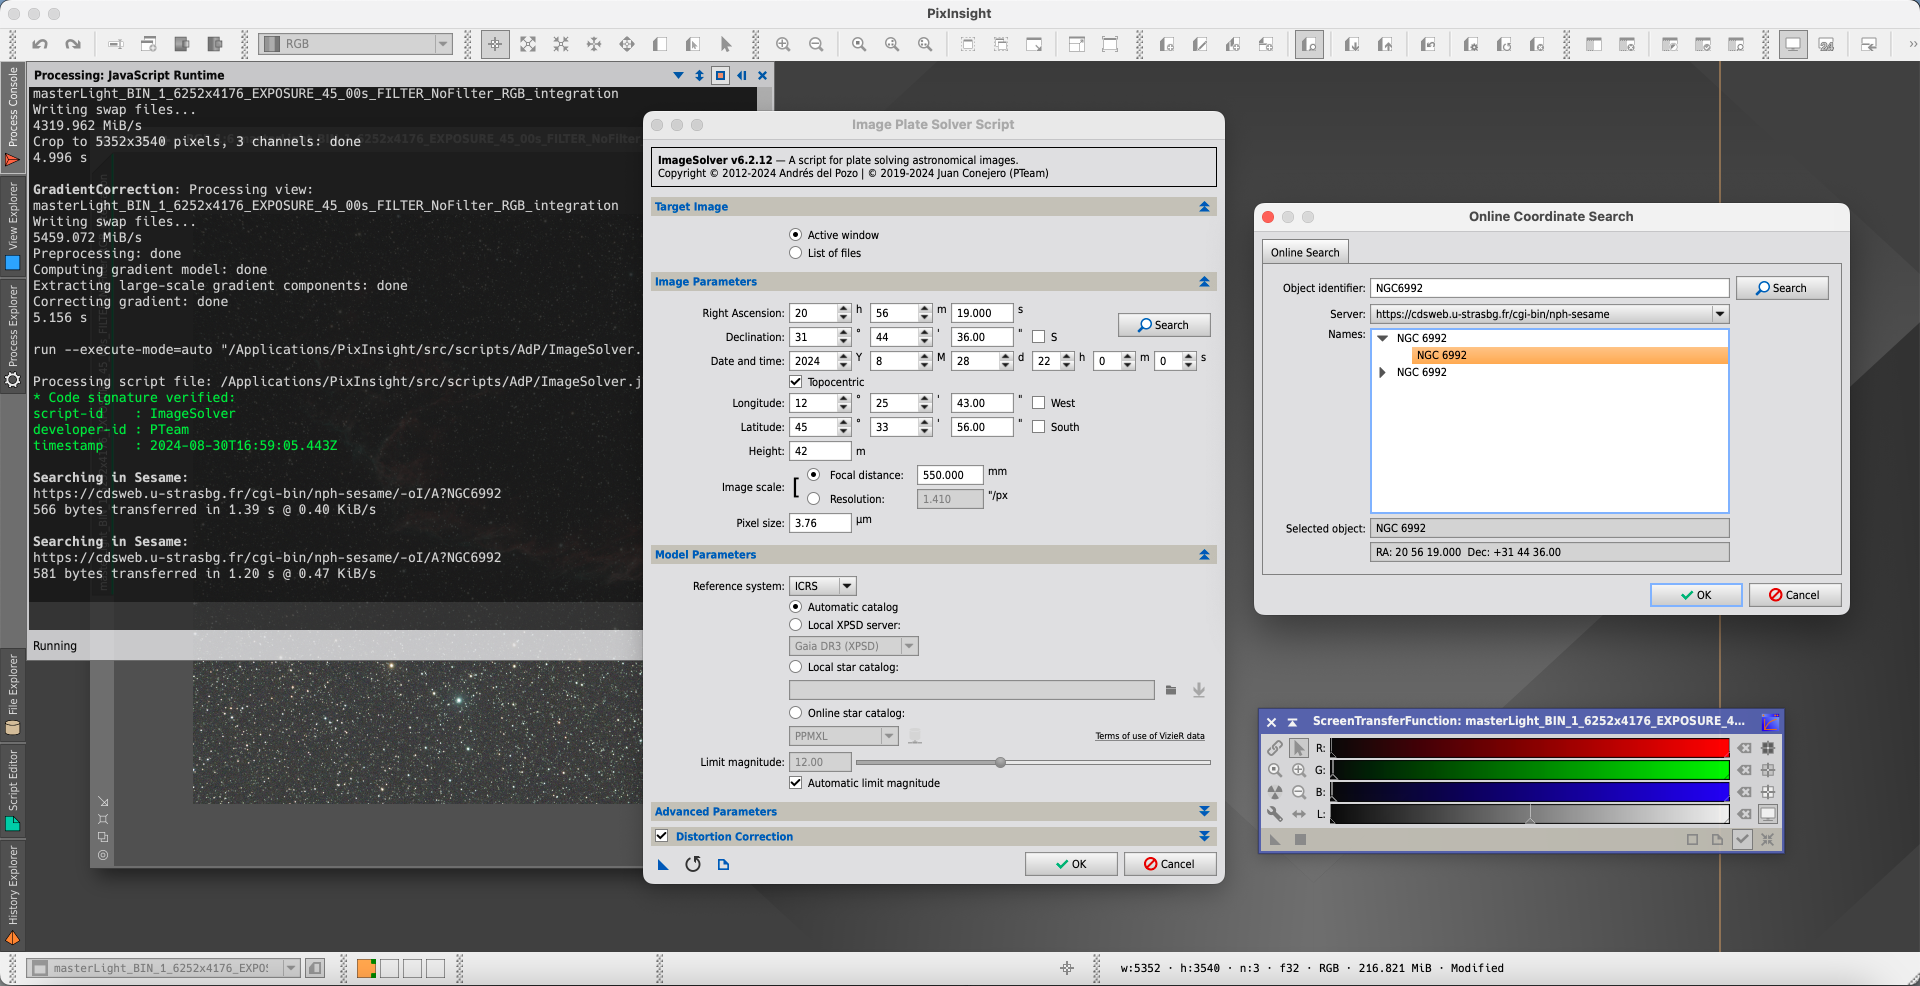
Before proceeding with color calibration, it is necessary to use the “Image Solver” script located in the Script -> Image Analysis -> ImageSolver. In the first window that appears, enter the focal length of the imaging instrument and the pixel size of the sensor used to capture the pictures. Then type date and time you captured image. Next, click on “Search” button, in the window that appears, type the name of the object in the “Object Identifier” field and then press “Search” button. Select the name of object that appears, and click OK button in the 2 windows. At the end of the process, the image will contain all the data necessary to be calibrated using the “Photometric Color Calibration” tool.
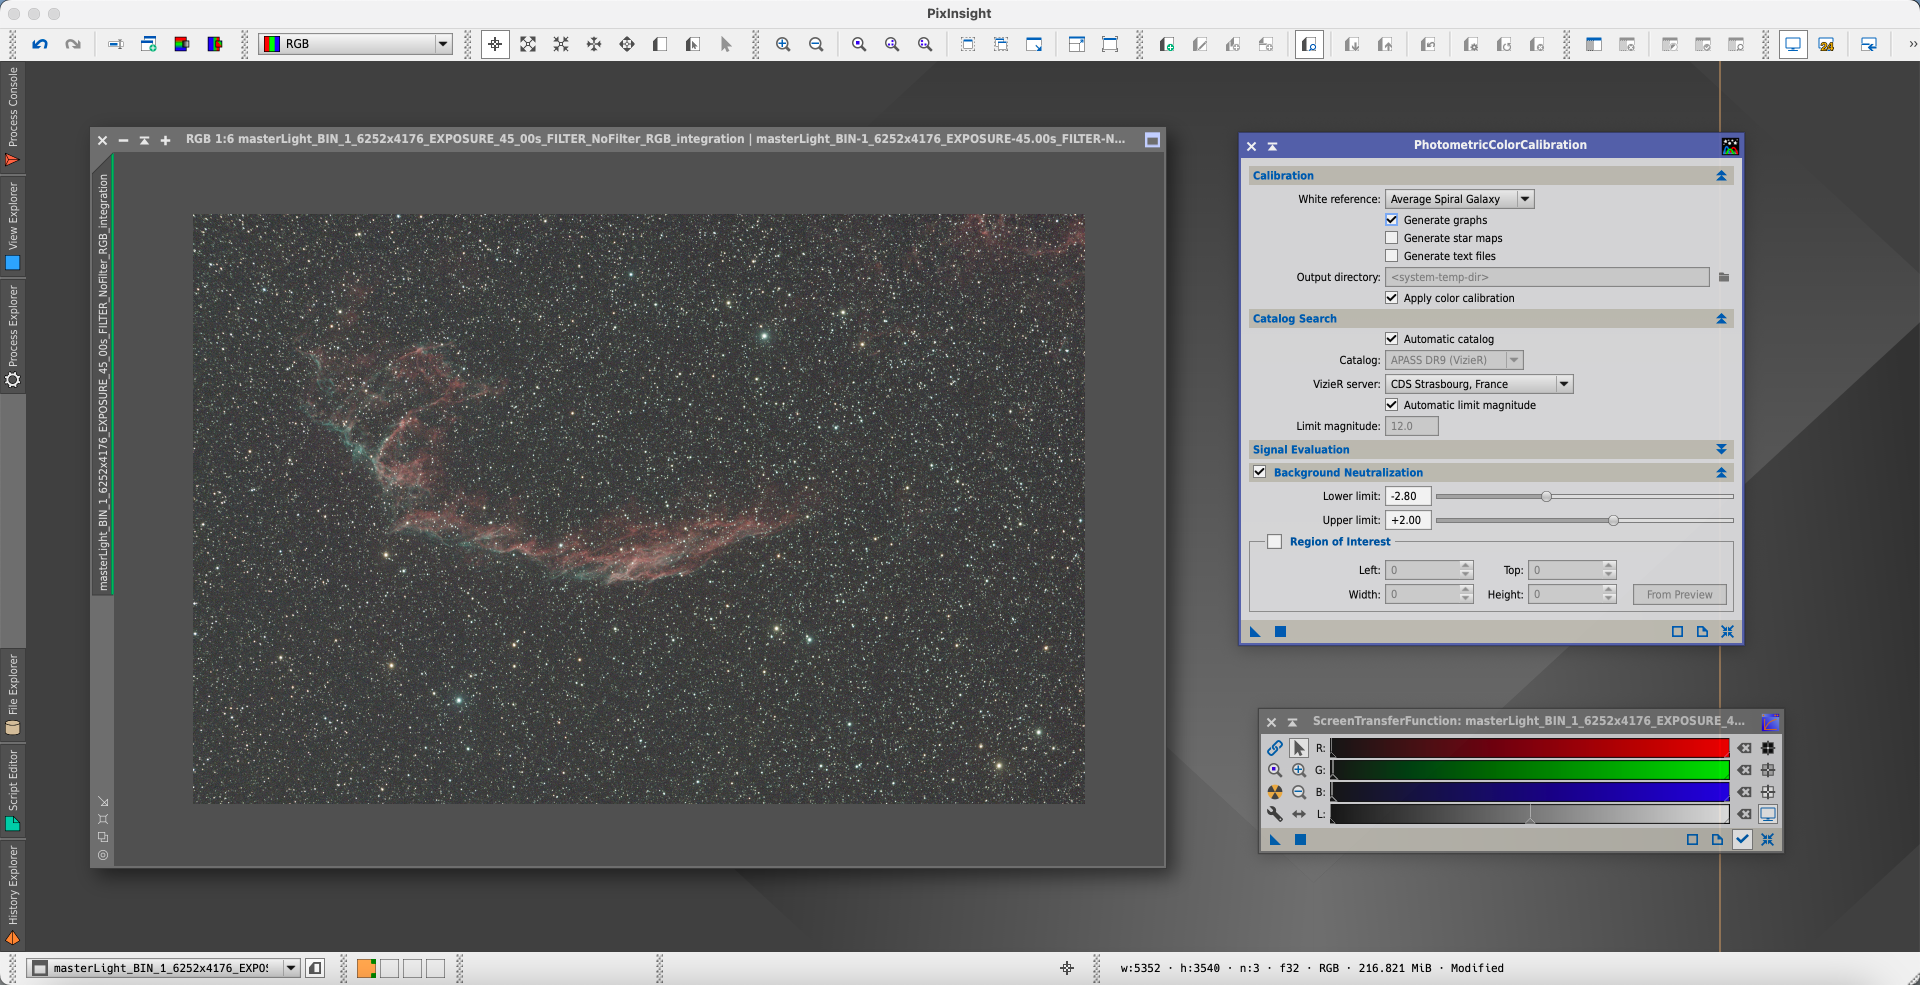
Launch the “Photometric Color Calibration” tool (Process -> All Processes -> Photometric Color Calibration) and, leaving all parameters to default values, click on the blue square at the bottom left of the tool window.
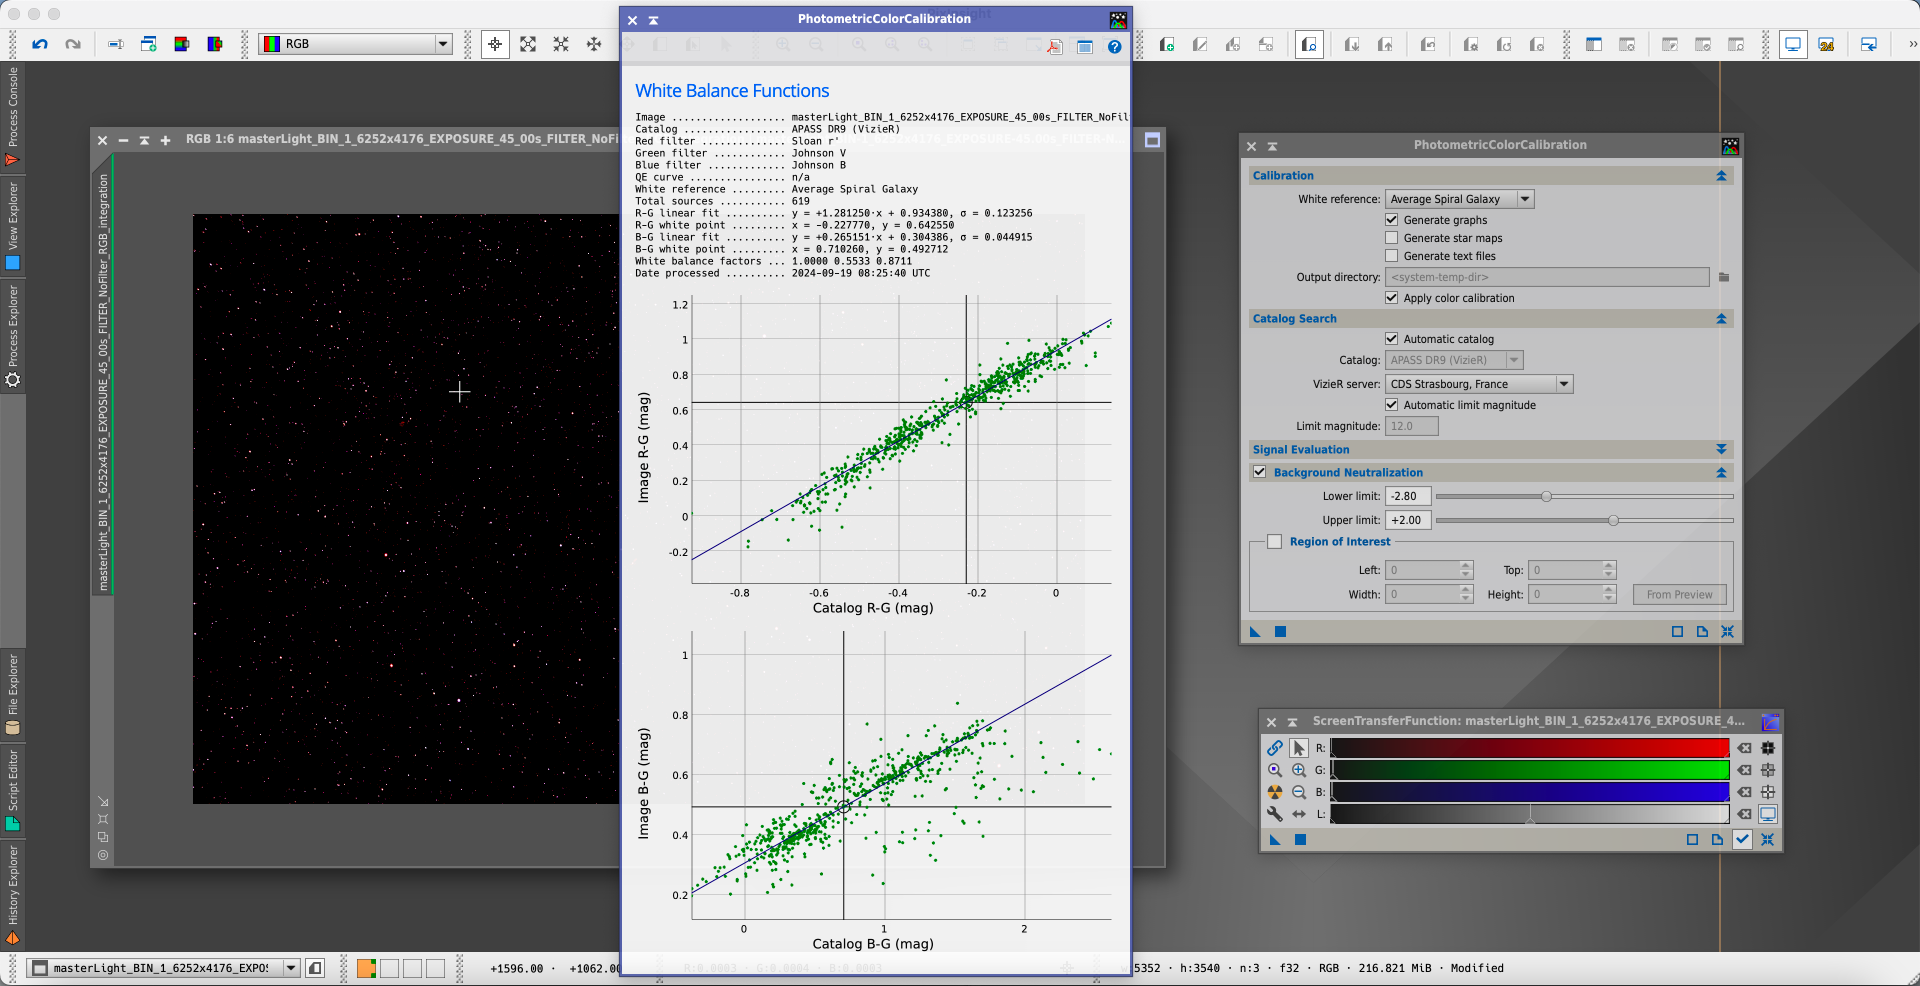
At the end of the processing, a graph will appear, and the image will look different.
We use the “Screen Transfer Function” tool (Process -> All Processes -> ScreenTransferFunction) by clicking the “Nuclear” button, this time with the “Link RGB Channels” option activated. This step is crucial before proceeding to the next steps.
All the previous steps have been applied with the image in linear state, by just stretching the histogram in order to better highlight the faintest detail. Now we’re going to transform the image to non-linear (commonly known as stretching): the process involves applying a non-linear adjustment to the brightness and contrast, through histogram stretch and curves adjustment. This process amplifies the fainter details without overexposing the brighter areas. In order to do this, let’s start from the “Histogram Transformation” tool (Process -> All Processes -> HistogramTransformation). First of all select the picture name in the name selector of HistogramTransformation window. Then click and keep the left-mouse button pressed on the small triangle icon on the bottom left of ScreenTransferFunction, then move it on the lower part of the HistogramTransformation window and release the mouse button.
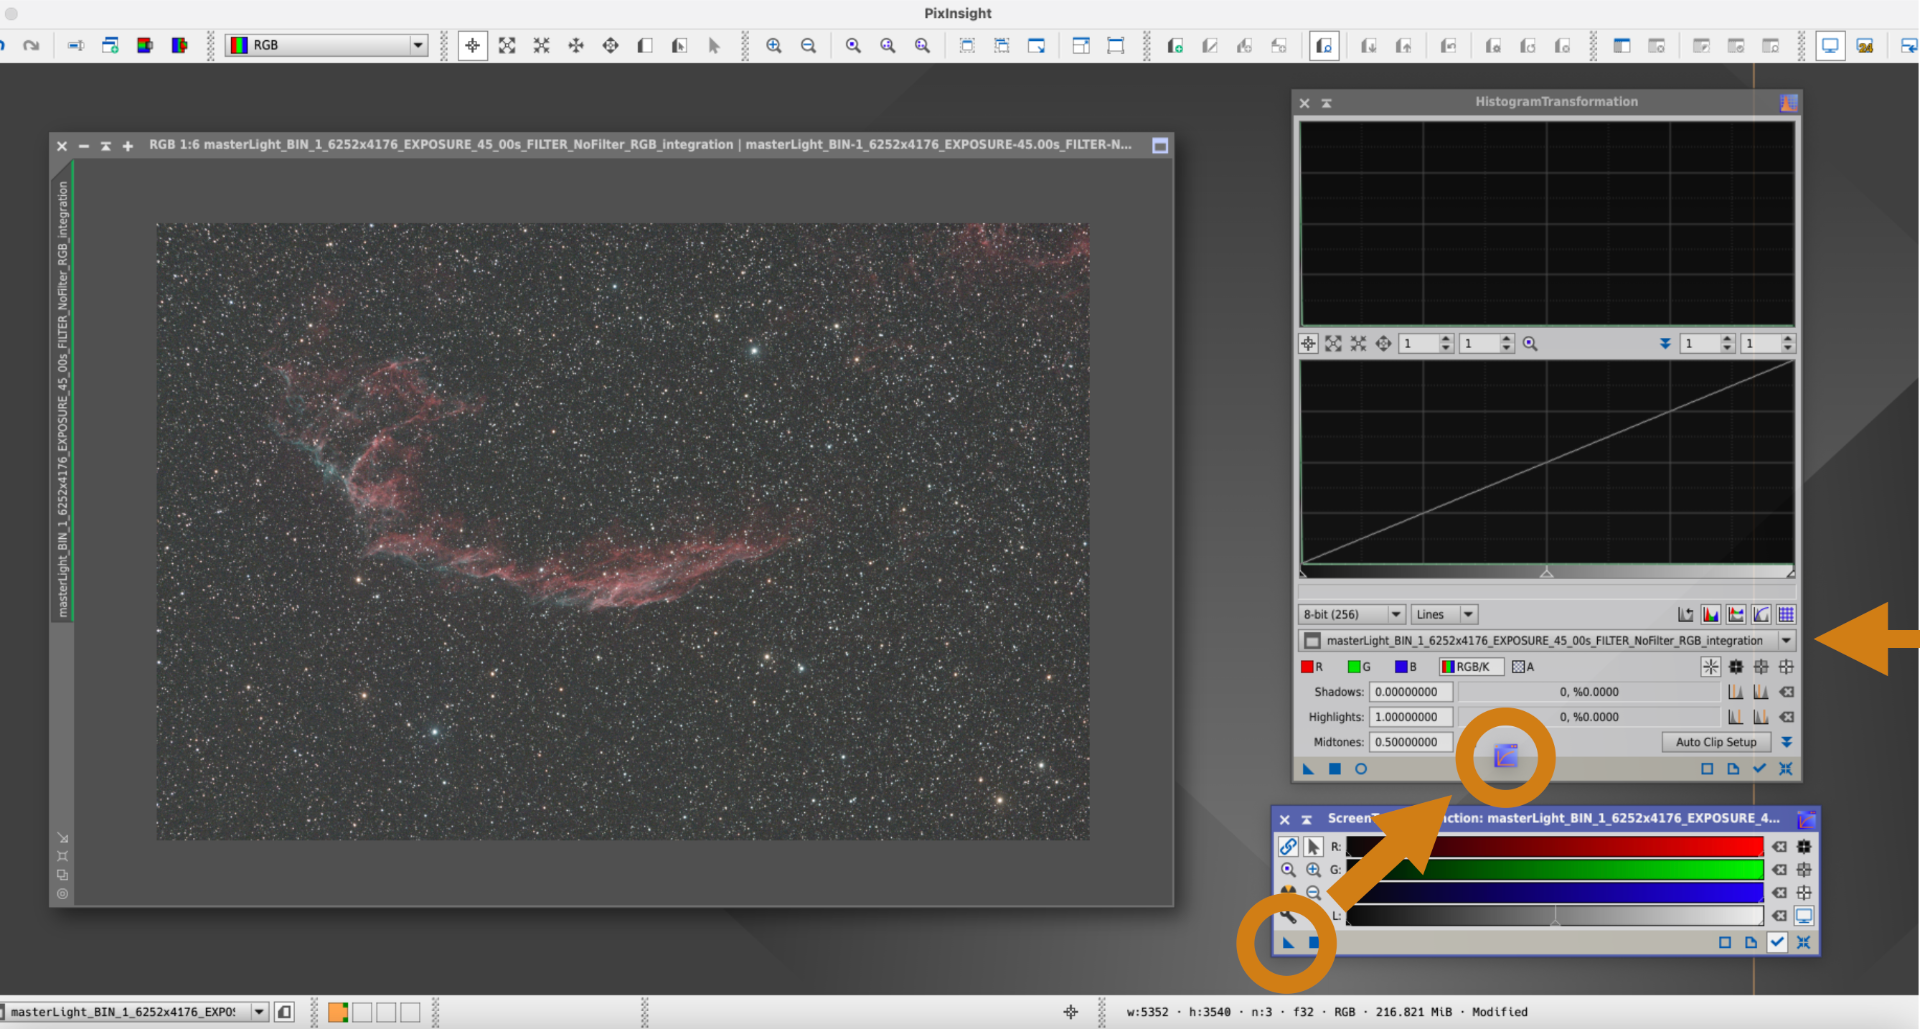
This will move the stretch level that we have on the ScreenTransferFunction to the HistogramTransformation window.
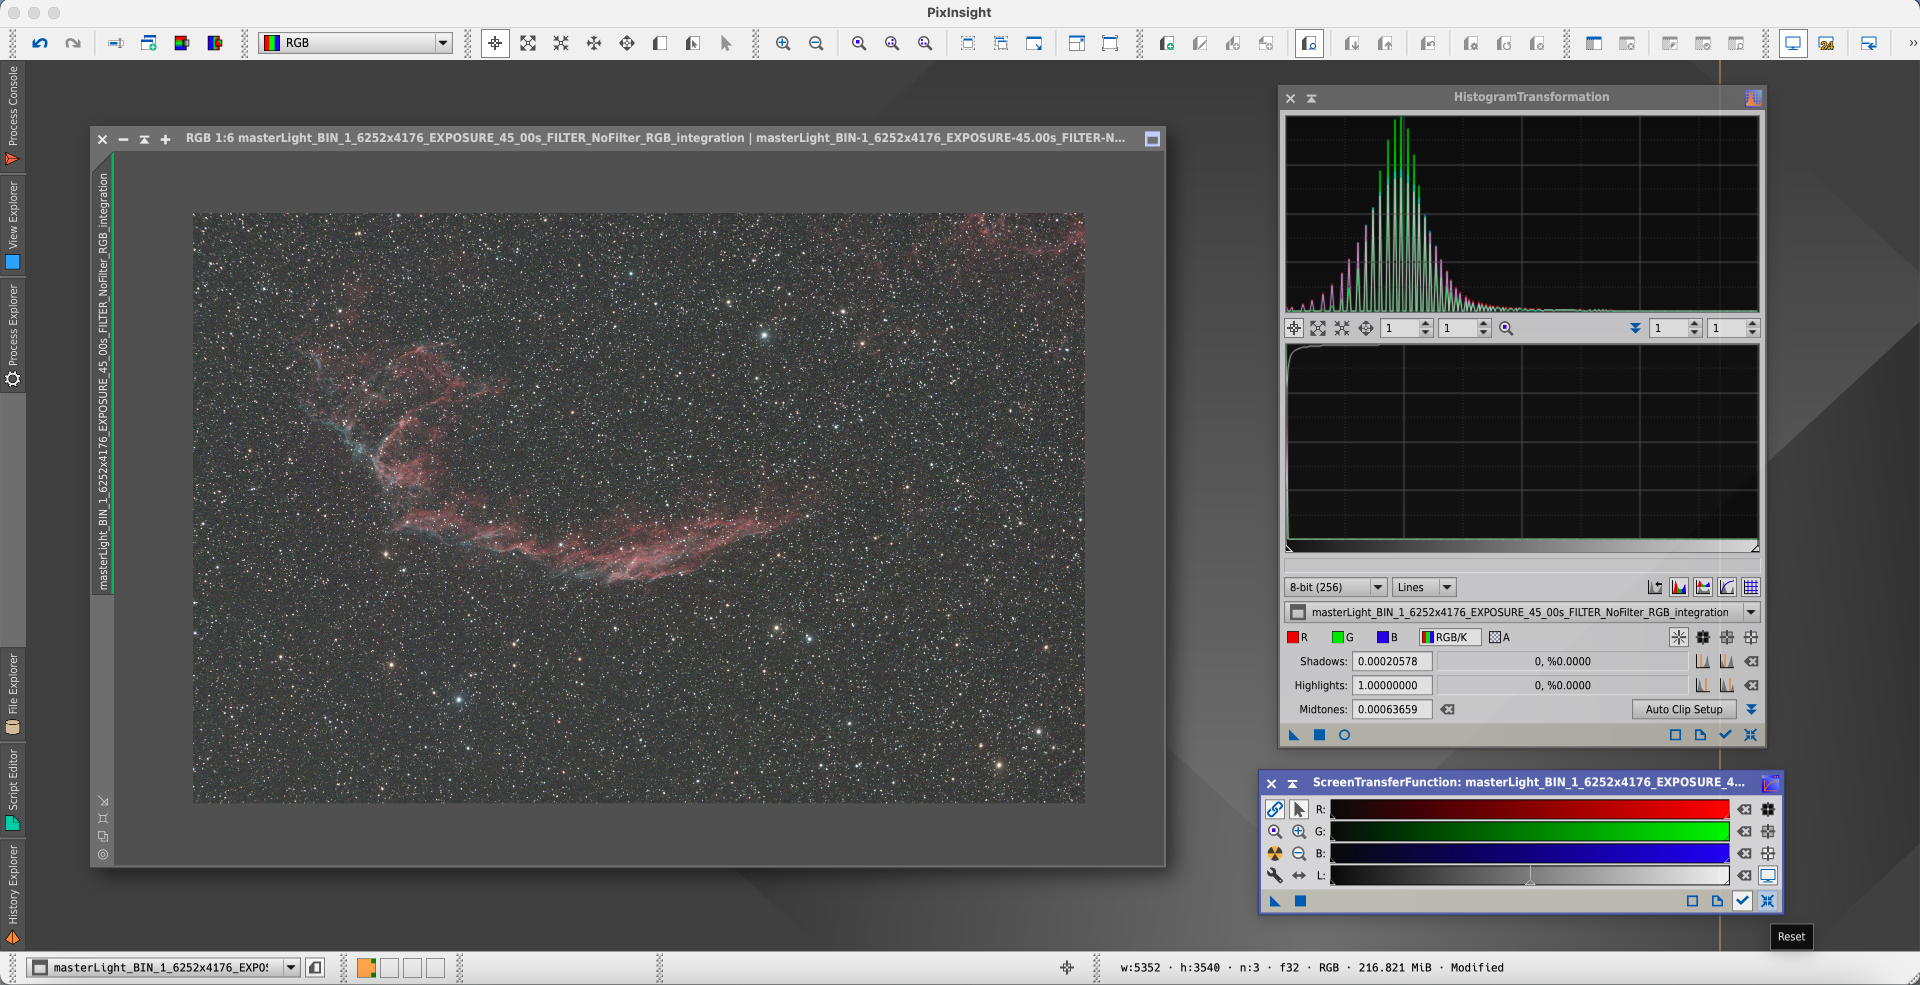
Now press the small square button to the bottom right of the HistogramTransformation window and, most probably, your picture will become white or very bright in any case. This is normal since, at this stage, we applied the histogram stretch in the HistogramTransformation window but also the stretch of the ScreenTransferFunction is still active.
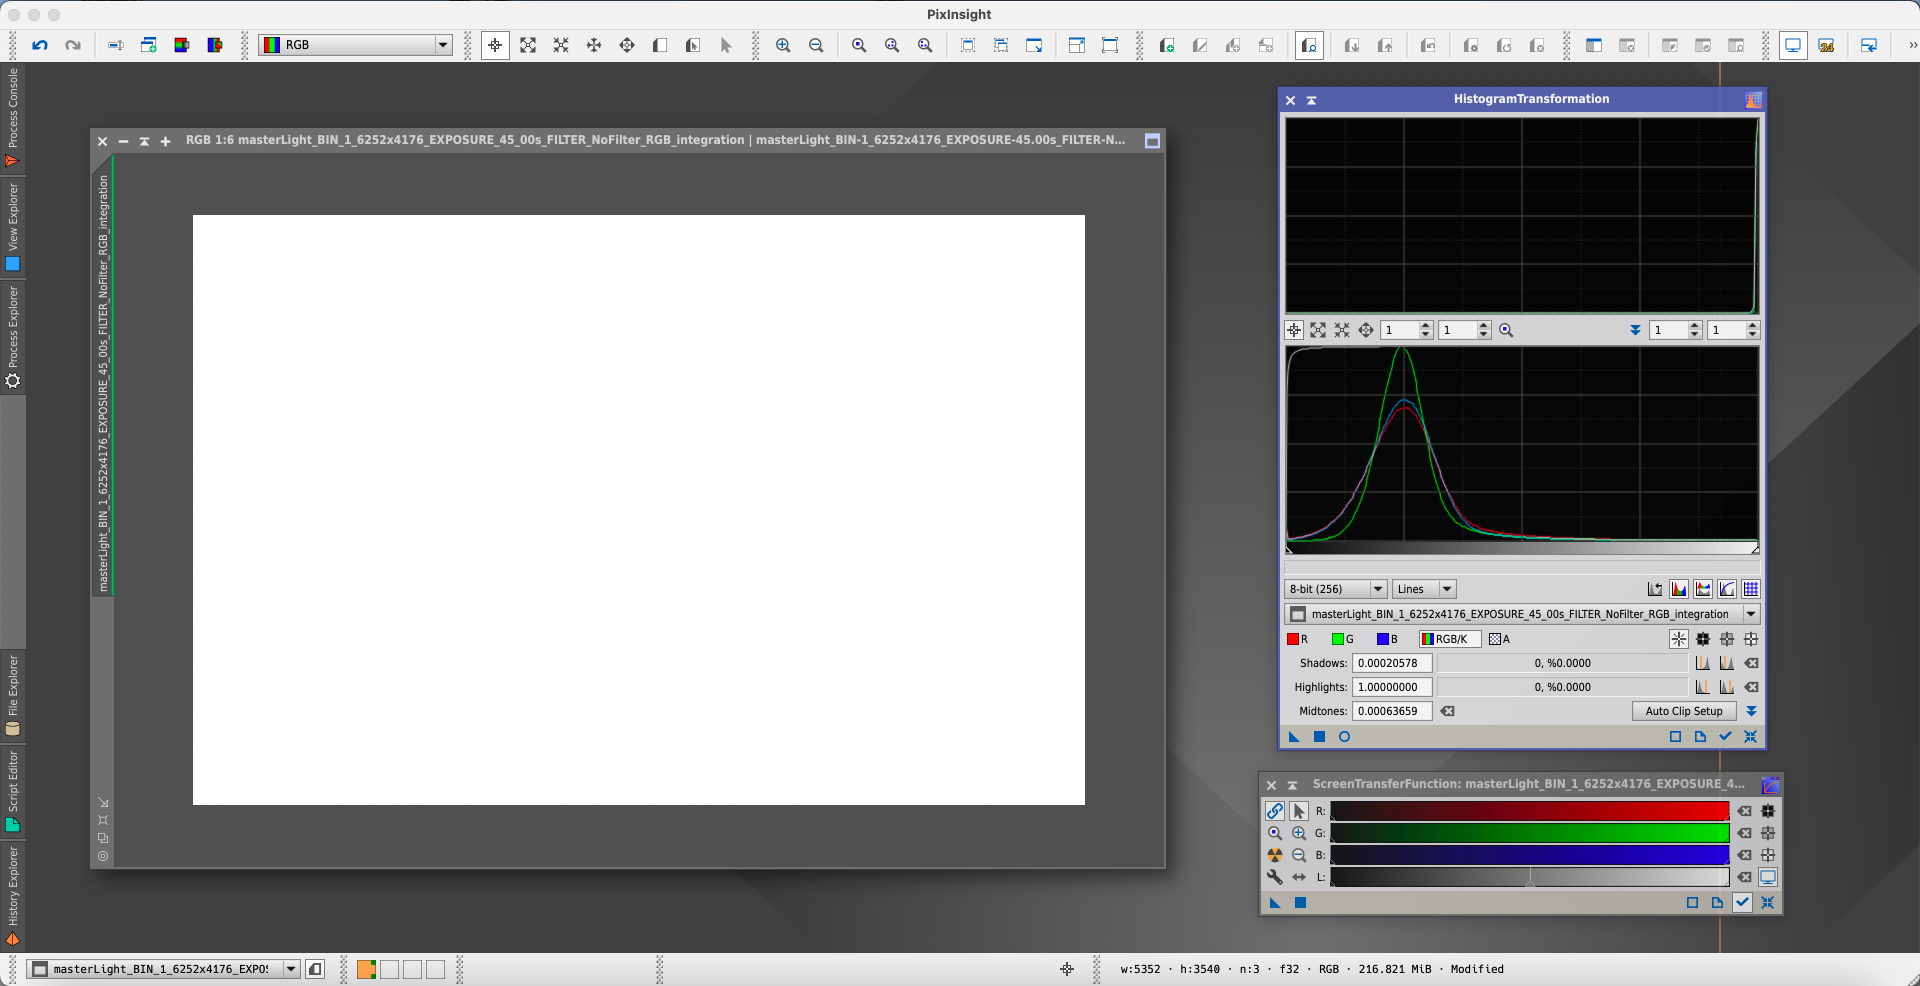
In order to correct this, just press the Reset icon in the lower-right part of ScreenTransferFunction window and your picture visualisation will be corrected.
Now we also improve visibility of the object (to make it a little bit brighter) and better set the background level (to make is a little bit darker) by using the “Curves Transformation” tool (Process -> All Processes -> Curves Transformation). Make sure that the “RGB” button is selected (1), then click on the Preview icon (2) to open the preview window (that allows you to instantly see the modification you’re doing on the image). Then click on the lower-left part of the curve (3) that corresponds to the darker levels. This will add a point to the curve and, by bringing it down a little bit, you will notice that the background will progressively become darker. Then click on the top-right part of the curve (4) that corresponds to the brightest levels. This will add a point to the curve and, by bringing it up a little bit, you will notice that the deep-sky object will progressively become brighter. The more you lower the darker levels and the more you increase the bright levels, the more contrast you will provide to your image but you will also notice that it will become progressively more “unnatural”. Here there is no a fixed rule here, you can choose the amount of contrast you prefer but, as a personal advice, I suggest you to keep the image as natural as possible.
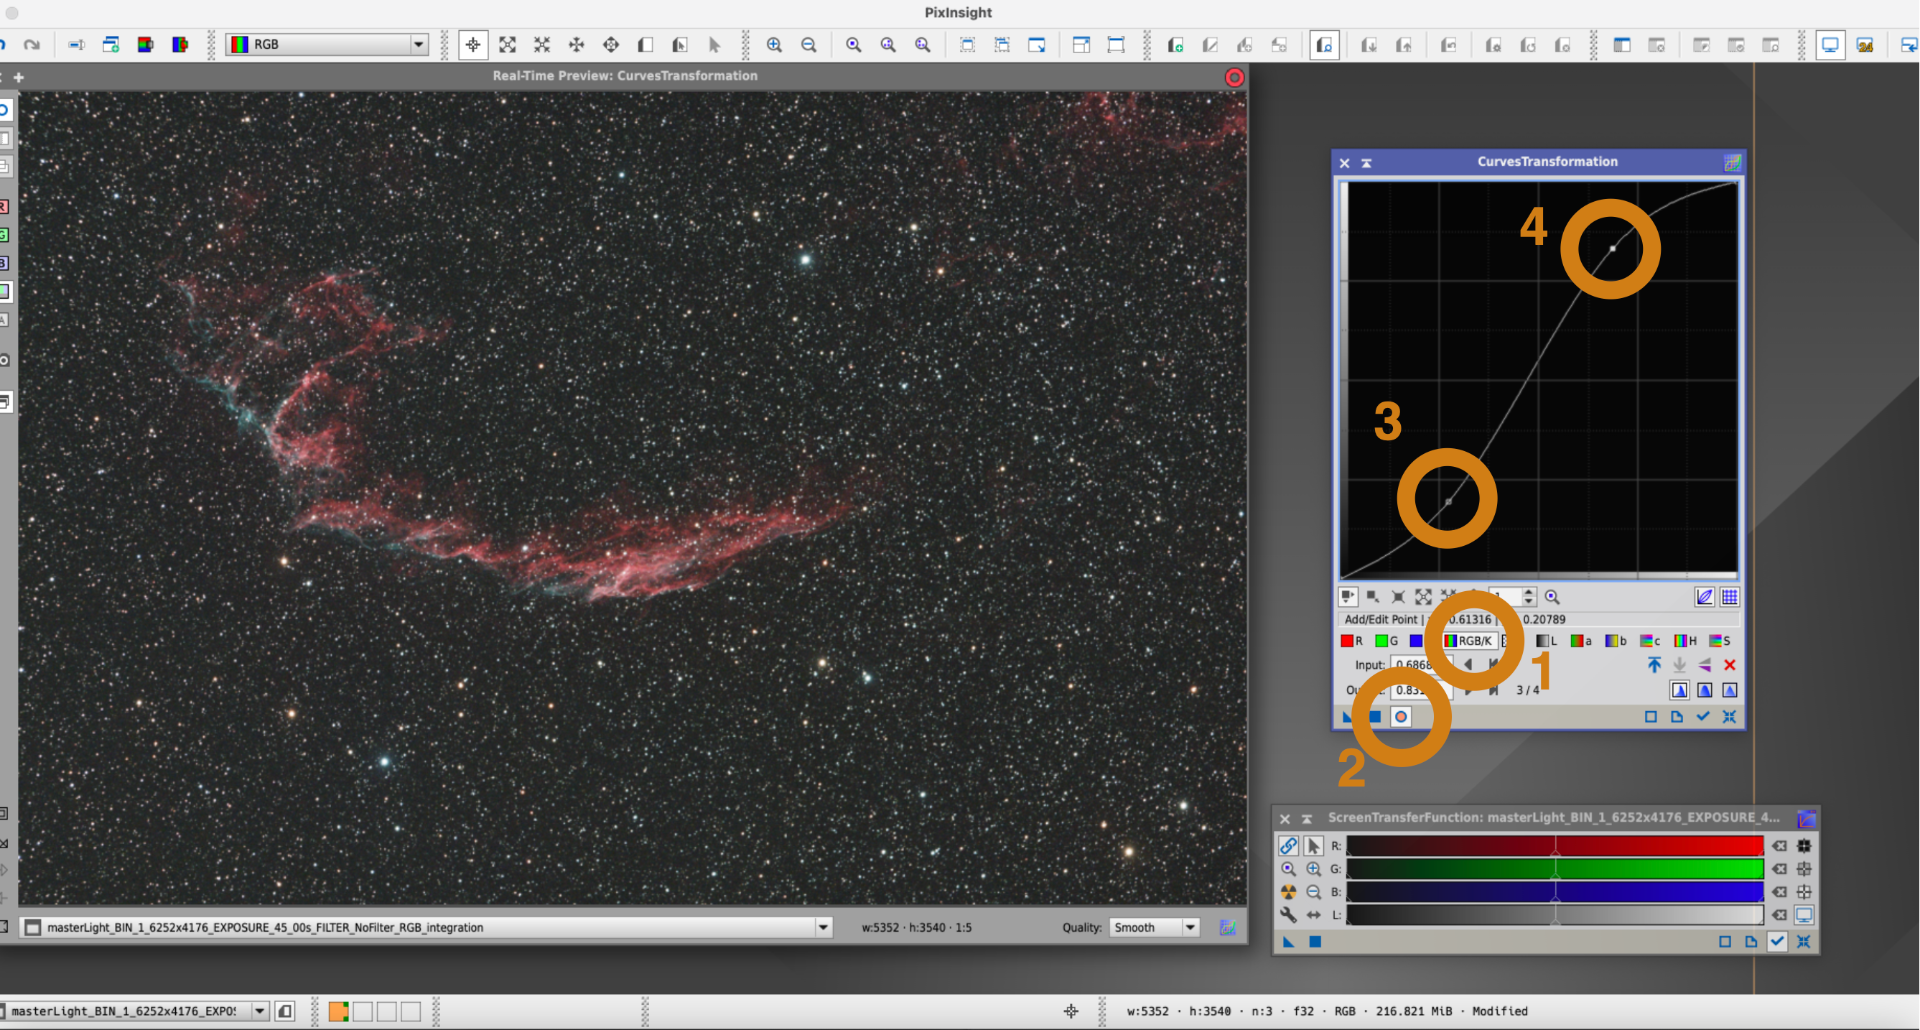
Finally you can also increase color saturation by clicking on the S button (5), then clicking on the saturation curve line around the center (6) and moving the created point higher a little bit. This will increase colours saturation. When you’re happy with the result, you can click the Apply icon (7) in the bottom-left part of the Curves Transformation to apply the modifications to your image.

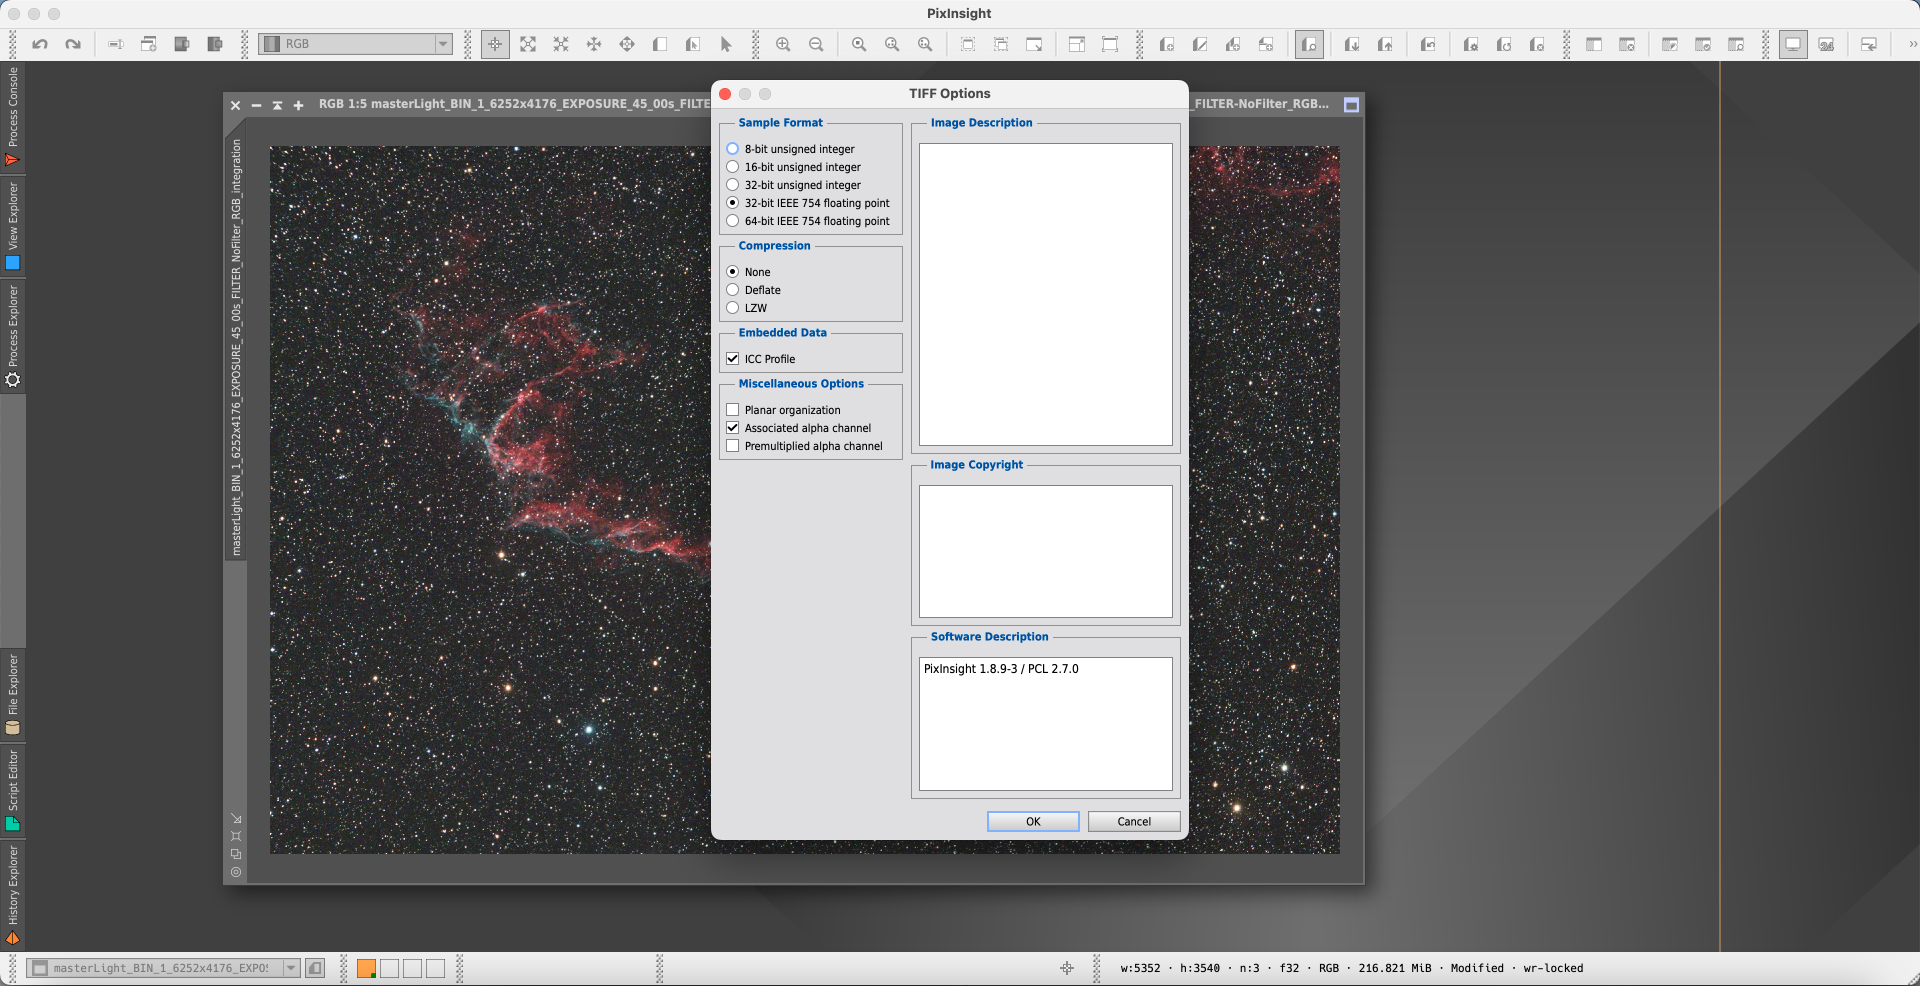
Now you can save the picture. If you want to save is in an uncompressed format that can be shared and opened also with other softwares, I suggest you to use TIF format. Select File -> Save As and, in the window that opens, select the file name, the folder position and “TIFF files” as format. Then press “Save” button.

This will open a new window, leave the settings unmodified and press the OK button to save your picture.
This completes the processing of your picture. Please note that this is a general procedure that for sure can be greatly improved thanks to the many tools available in Pixinsight but this may be also a guide to let you start in advanced astrophotography processing.